


How to Make a GIF: The Complete Guide
If you want to take your social media strategy to the next level and really say what you mean online, it’s essential that you know how to make a GIF. You can use GIFs to create eye-catching ads, or to connect with your followers through relatable moments from pop culture.
This article will show you how to make a GIF, and also explore the most effective ways to use them on social media and beyond.
Table of contents
What is a GIF?
How do you pronounce GIF?
How to make a GIF: the basics
How to make a GIF with Photoshop
How to make a GIF without Photoshop
How to make a GIF on mobile
How to create screen-recording GIFs
Tips for using GIFs on social media
Bonus: Download a free cheat sheet to quickly find the best image sizes for every social network and learn how you can use Hootsuite to easily add them to any post.
What is a GIF?
The Graphics Interchange Format, or GIF, chains together multiple bitmap (BMP) files into a single animated image. Each pixel within a GIF can be one of 256 colors, which is why GIFs generally look low-res compared to other videos we see online. GIF have lower frame rates, too, which works to their advantage. More frames equal bigger files, and GIFs need to stay small and shareable.
You could think of GIFs as the midpoint between images and videos. The main advantage of using GIFs is that you can tell a story quickly, and it doesn’t take much bandwidth to load them—making them perfect for mobile.
If you’ve ever thought GIFs seem a little primitive, well, that’s because they are: the animated GIF has existed in its current state for 30 years, predating the Internet itself!

GIFs have exploded in popularity in recent years. GIPHY, one of the web’s more popular GIF databases, claims to have over 300 million daily active users. Last month, Google acquired Tenor, a keyboard app and GIF archive designed to help iOS, Android and desktop users find the GIFs they want quickly. Tenor processes over 400 million GIF searches per day.
How do you pronounce GIF?
GIF was 2012’s Word of the Year, and even though we engage with GIFs every day, we can’t seem to agree on their pronunciation. Is the G soft (like gin) or hard (like giggle)?
In my humble opinion, it’s “GIF”, not “JIF.” Remember, GIF stands for Graphic Interchange Format: that’s graphic, not jraphic.
I’m willing to die on this hill, but you don’t have to agree with me.
Steve Wilhite, grandfather of GIFs, initiated a storm of Internet discussion when he accepted a Lifetime Achievement Award at the Webby’s in 2013. His five-word speech expressed solidarity with the soft G camp, proclaiming, “It’s pronounced ‘JIF’ not ‘GIF!”
Cue side-eyes from half of the Internet.
Ultimately, there’s no right way to say GIF. Even the Oxford English Dictionary has remained neutral on the issue. The debate will probably rage on until we invent a new file type to express our feelings online.
Even if you can’t decide how to say it, it’s still fundamental that you learn how to make a GIF. Let’s check out the basic steps, then explore some tools to help you make GIFs in a jiffy.
How to make a GIF: the basics
If you’re looking to make a GIF quickly, the best approach is using a GIF conversion site like GIPHY, Make A Gif, or Gifs.com. These platforms all function slightly differently, but the following steps will give you a rough idea of what to expect when you’re using them to make a GIF for the first time.
1. Choose the video you’d like to make into a GIF
The best GIFs target relatable moments that apply to specific feelings or situations. Pick something that will resonate with your target audience. For example, in my article about YouTube ads, I used a GIF of someone angrily smashing their computer with a hammer. If you’ve ever had your solo kitchen dance party interrupted by an unskippable ad, you can probably relate.
Find a video that captures your moment. You can use one you’ve saved to your computer or mobile device, or search online: YouTube and Vimeo are widely-used resources for clips.
2. Upload the video for conversion
If you’re uploading your own video, select that option within the converter you’ve chosen, and upload the video. If you’re using a video hosted on YouTube or Vimeo, paste the complete URL into the converter’s URL field.
3. Establish the length of your GIF
When you’ve uploaded your video file, isolate the moment you’d like to capture by bookending it with timestamps. GIFs support up to 3 minutes of footage, but two to six seconds is more than ideal.
4. Optional step: add text
GIFs don’t include sound, so you can add text for extra direction or meaning. Subtitles can provide context if you’re GIF-ing a quotable moment. Alternatively, you can use text to highlight a situation or feeling you’re hoping to express with the GIF (e.g., “Social media influencers be like…”).

5. Download your GIF
If you’re on desktop, you’ll notice that if you try to open the newly-downloaded GIF file it won’t be animated, and instead shows a series of frames. Don’t panic! Simply drag the GIF into your web browser and the animation will start looping. On mobile, GIFs play instantly when opened.
These are the basic steps of how to make a GIF, but there are actually several different approaches, especially if you want to use your own source material.
Let’s start with the most complicated option: how to make a GIF using Photoshop.
How to make a GIF with Photoshop
Note: all screenshots used in this article are from Adobe Photoshop CC 2018 (19.1.2 release).
In Photoshop, you can string together a collection of images into a GIF. To make the following GIF (which I’m probably a little too proud of…) I saved about 20 screenshots I’d taken in Photo Booth.

You can also use a short video file to make GIFs in Photoshop. The process is almost the same, except for the first step.
If you’re starting with a photo series, begin at step 1A.
If you’re converting a video into a GIF using Photoshop, start at step 1B.
1A. Load your deck of photos into Photoshop
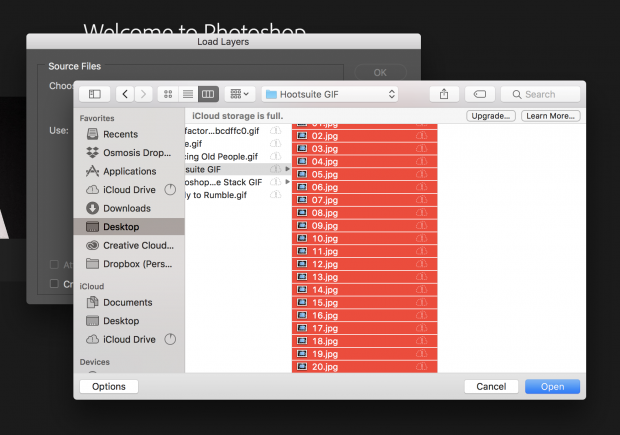
In Photoshop, go to File > Stack > Load Files into Stack. Click Browse, then select the range of photos (“layers”) you’d like to make up your GIF by shift-clicking on the full list.
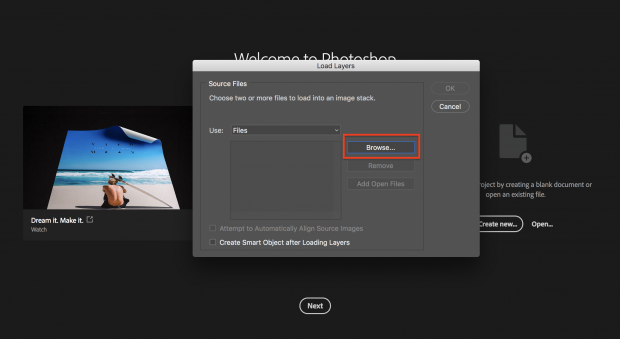
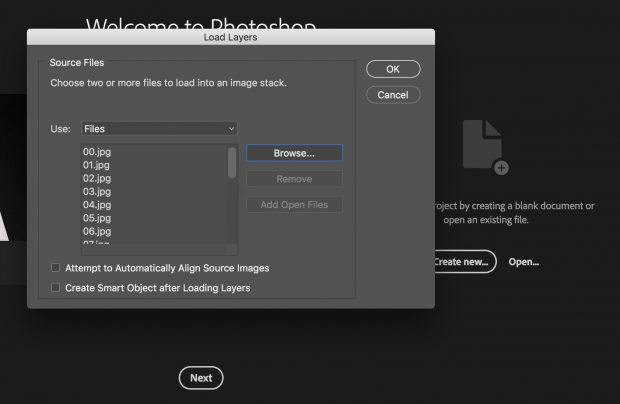
The “Load Layers” screen should look like this one below. Click OK and head to step 2!
1B. Load your video file into Photoshop
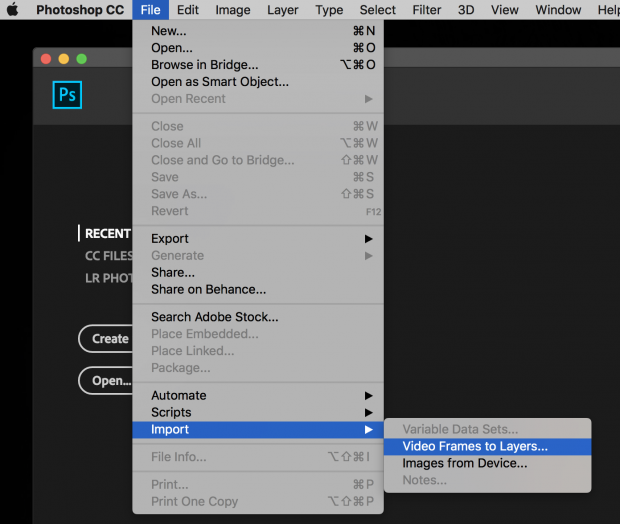
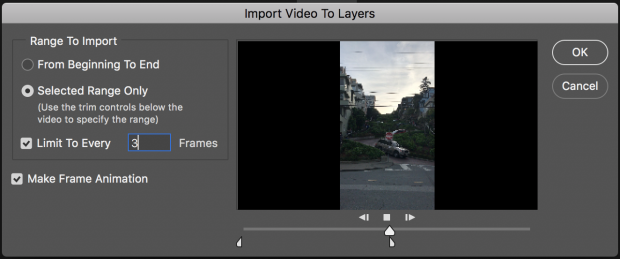
To turn a short video into a GIF using Photoshop, you’ll need to make layers out of the existing video frames. First, click File > Import > Video Frames to Layers…
A new window will pop up asking which portion of the video you’d like to import. It isn’t necessary to import every single frame to make a GIF. In this case, I imported every 3 frames, and only half of my video footage. When you’re satisfied, click OK.
Once you’ve imported your video file into layers, skip to Step 4.
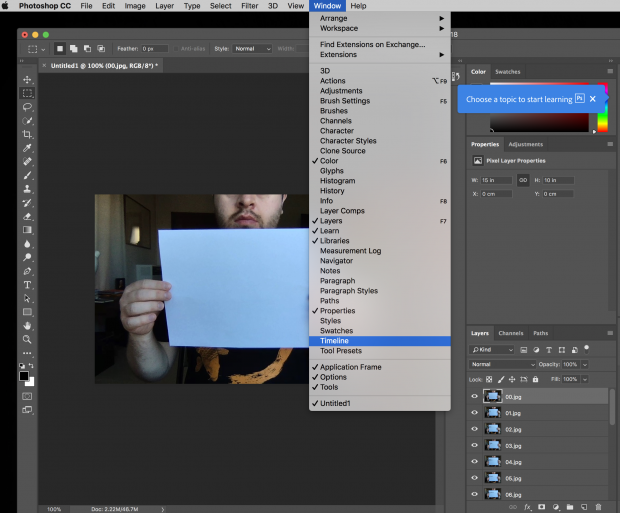
2. Create a Timeline for your GIF
Under the “Window” menu, scroll down and click Timeline.
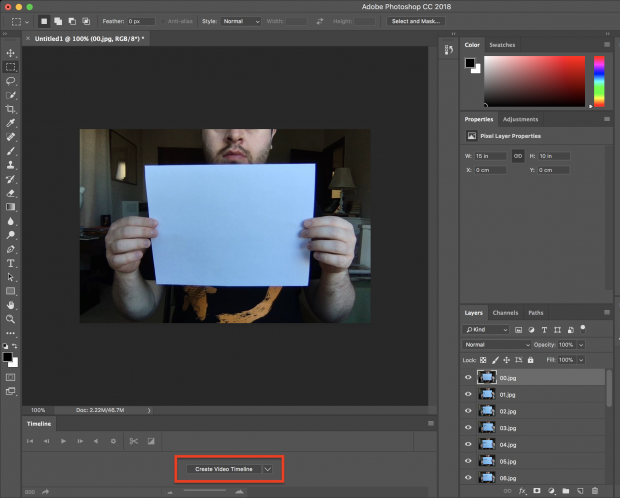
A small box will appear under the first image in your list: Create Video Timeline. Click this and change it to Create Frame Animation.
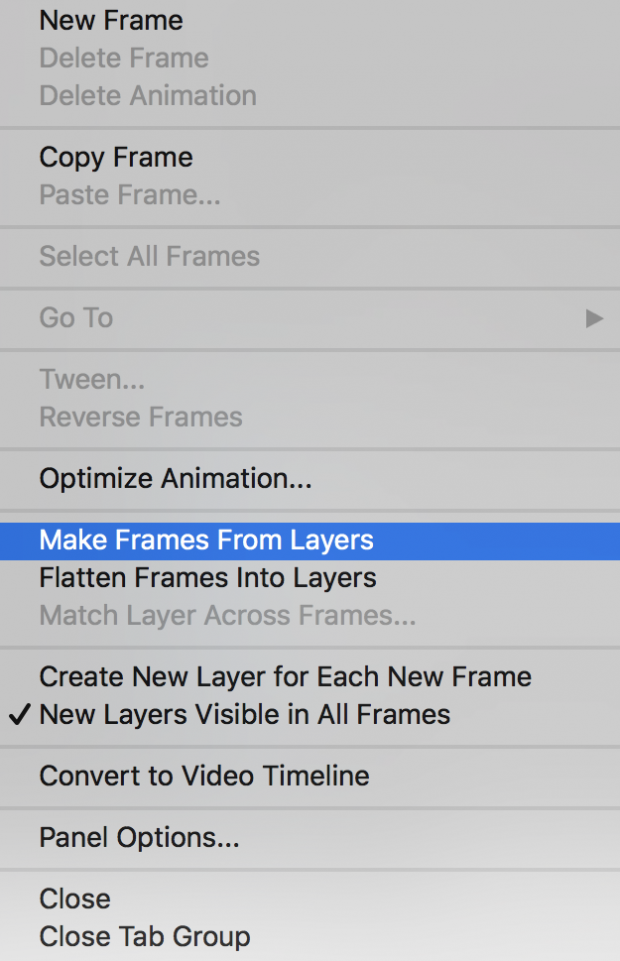
3. Convert your photo layers into a set of looping animation frames
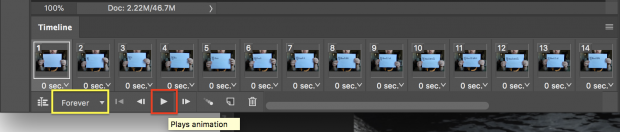
In the top right of the “Timeline” panel you’ll see a little hamburger menu (outlined in yellow).

Click on the hamburger menu, scroll down, and click on Make Frames From Layers.
The “Timeline” panel will now show your animation frames in sequence. You can drag these around to reorder them (I named my files in sequence to skip this step).
Press the triangular Play icon (outlined in red below) to get an idea of how your GIF will look. Also, make sure Forever is selected in the drop down menu to the left (outlined in yellow), otherwise your GIF will only loop a set number of times.
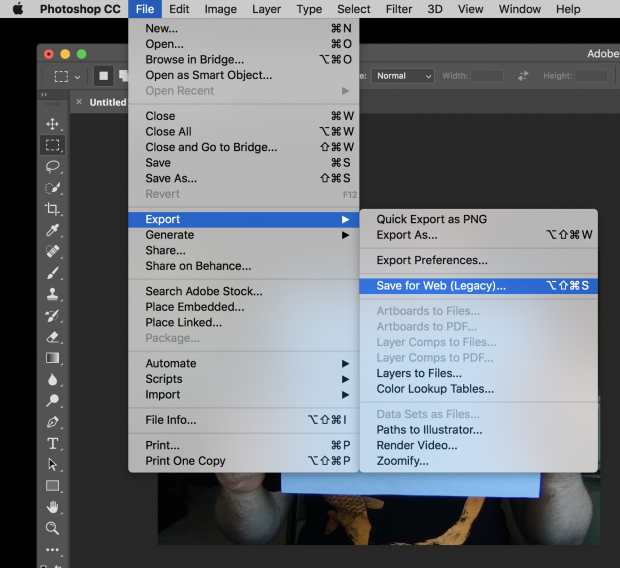
4. Export your GIF
Click File > Export > Save for Web (Legacy)…
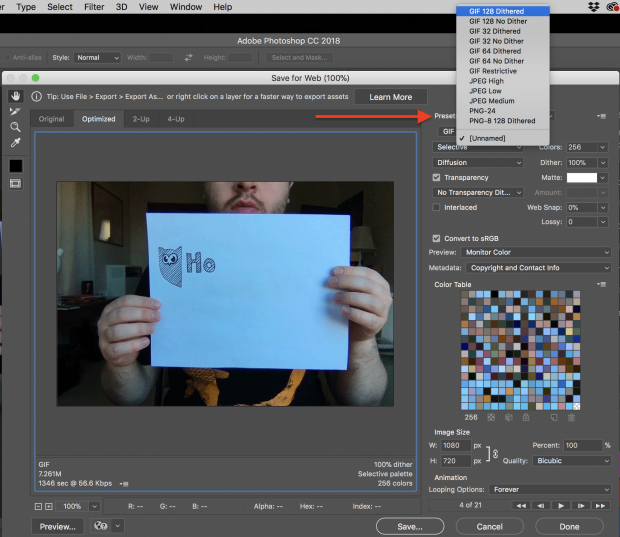
You’ll come to this menu below. It looks a little overwhelming, but don’t worry. Under the “Preset” menu, select GIF 128 Dithered.
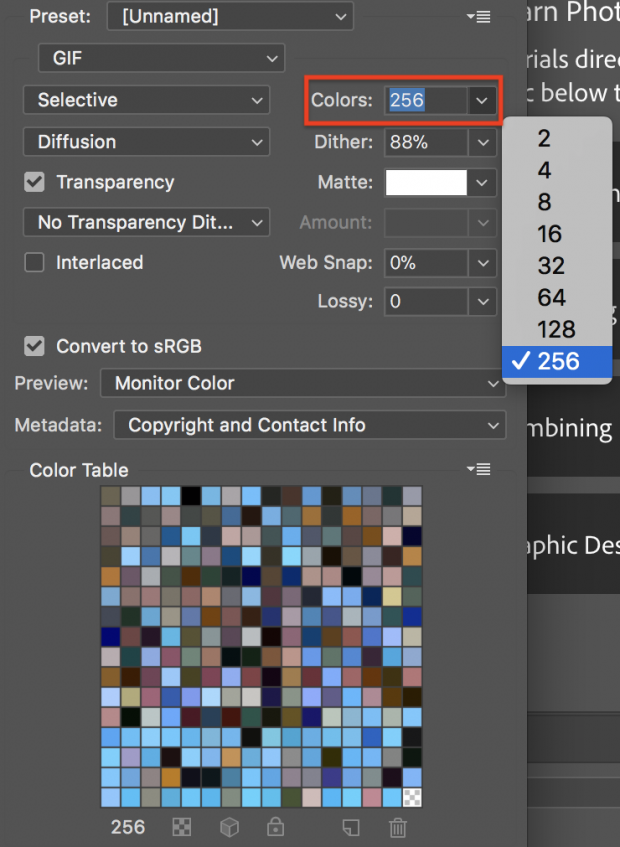
Next, change your Colors setting to 256 (the max number for a GIF).
Now you’re ready to export your GIF. To see how it turned out, press Preview… in the bottom left corner. It’ll open your default web browser and play a looping preview of your GIF.

Next, click Save… to name your GIF file, and download the GIF to your computer.
And that’s it! Congratulations! You know how to make a GIF in Photoshop.
How to make a GIF without Photoshop,
If you don’t have access to an Adobe Creative Suite subscription, don’t despair: there’s more than one way to GIF a cat.
Make your own GIF from a YouTube video
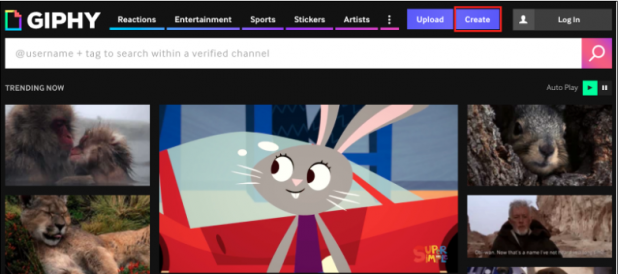
1. Head to GIPHY.com and click Create
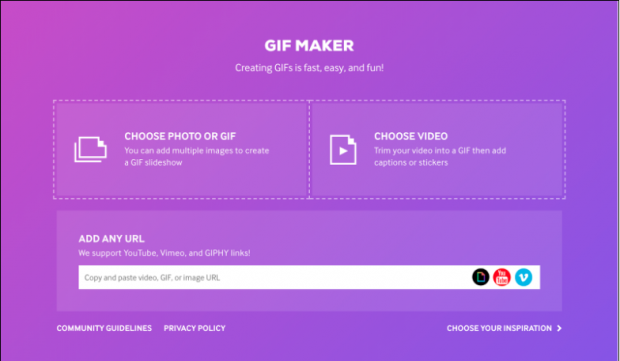
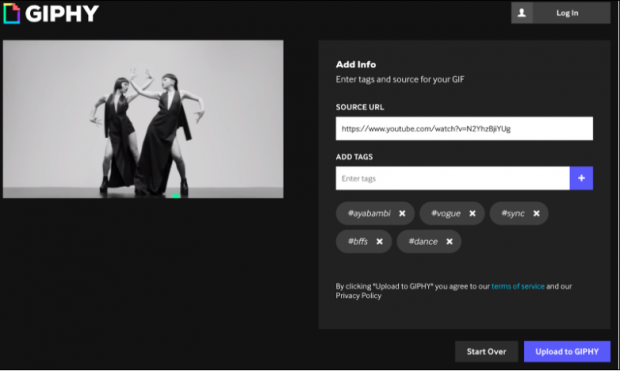
2. Add the URL of the video you’d like to make into a GIF
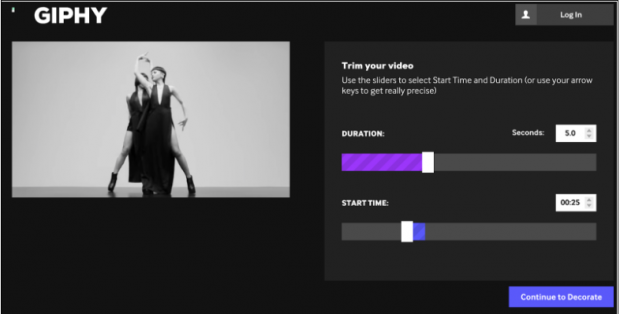
3. Find the moment you’d like to capture, and establish your GIF’s duration
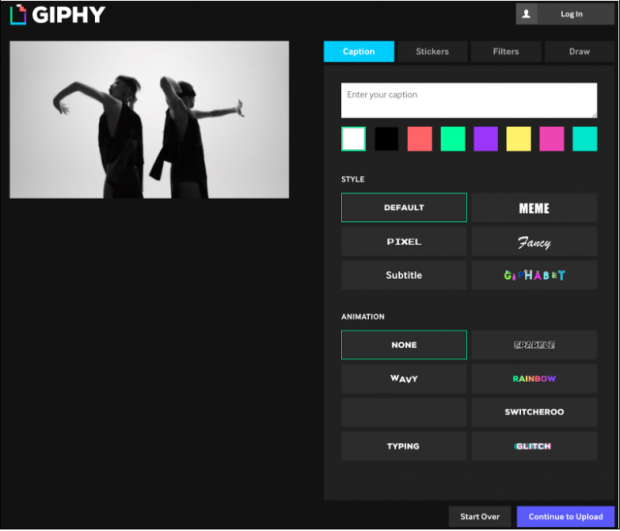
4. Optional step: decorate your GIF
There are a variety of options in here. You can add text (GIPHY has several different typefaces and colors to choose from), or jazz up the GIF with stickers, filters, or even hand-drawn annotations. I didn’t add anything because I didn’t want to distract from AyaBambi’s sweet dance moves.
5. Optional step: add hashtags to your GIF
Add hashtags if you want people to find your GIF and share it widely. Include your brand name and some common related terms in your list so it’s easily searchable.
6. Upload your GIF to GIPHY
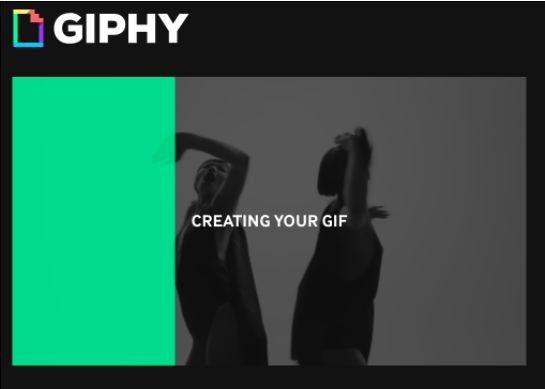
And with that, you’re done! To include the GIF in your social media posts, simply insert the Giphy link or download the Giphy file and attach it (the method required will vary depending on the platform, but more on that below).
PS: You can follow these same steps to upload a GIF you’ve made previously. Just add a link to the GIF URL in place of the YouTube video link at the start.
How to make a GIF on mobile
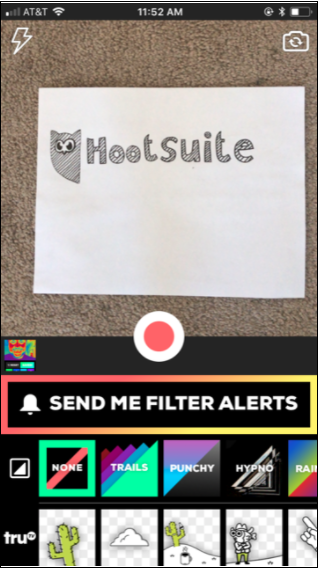
Mobile apps like GIPHY Cam allow you to make GIFs on your phone. These are extremely easy to use: if you’ve ever used Snapchat, you can handle GIPHY Cam.
1. Launch the app and record your GIF
Tap the photo button to take a short burst of photos, or hold it for a longer GIF.
2. Optional step: choose a filter, or add stickers/text
3. Save your GIF and share it with the world

How to create screen-recording GIFs
Apps like GIPHY Capture, ScreenToGif, LICECap and GifCam allow you to make GIFs of your on-screen activity. This is a great option if you’re writing a short instructional article (like something for an online help center) and want to show steps visually.
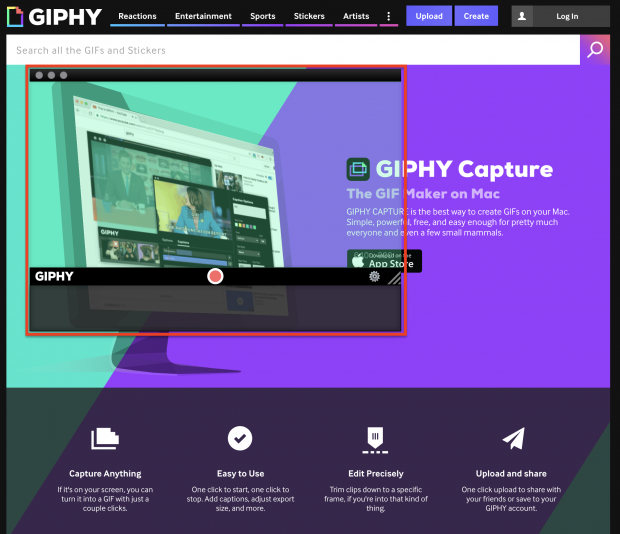
1. Launch the screen-recording GIF software
When you launch the software, you’ll see a recording overlay like the red-outlined section in the screenshot below.
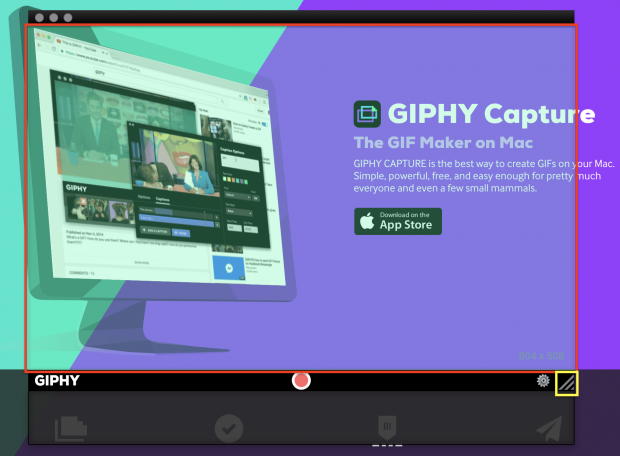
2. Pull the mask over the area you want to record
With GIPHY Capture, you can record anything within the recording overlay (again, outlined in red). To enlarge this area, click and drag the bottom-right corner (outlined in yellow).
Bonus: Download a free cheat sheet to quickly find the best image sizes for every social network and learn how you can use Hootsuite to easily add them to any post.
Get the free guide right now!3. Record your on-screen activity
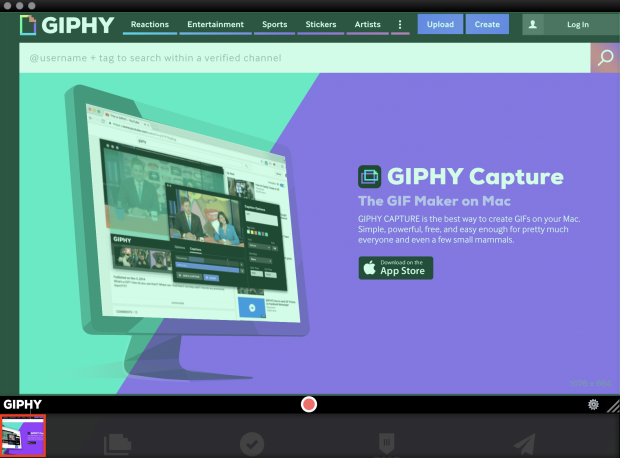
Press the circular red button in the center to record, then press it again to stop recording. You should see a thumbnail preview of your GIF pop up in the bar below the recording overlay.
4. Customize your GIF settings
Minimize the recording overlay and take a look at the GIF options menu. Here you can customize various aspects of your GIF, including the loop type—normal, reverse, or ping-pong—pixel size, and frame rate. Drag the tabs in from the left or right to trim your GIF. You can also add captions from this menu.
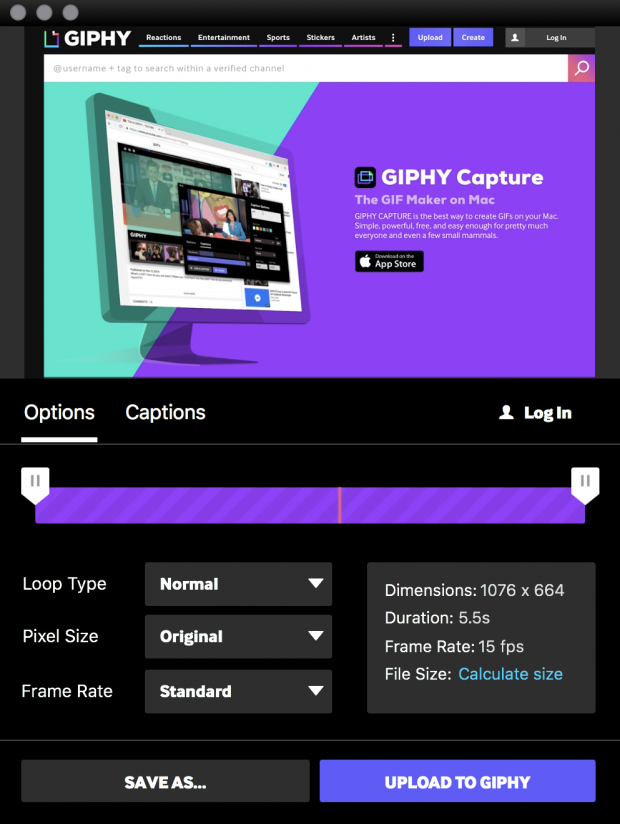
When you’re ready, you can click the blue “Calculate size” text to get an idea of how big your GIF file will be. I reduced the quality of my GIF when I realized it was going to be over 8 MB (under 3 MB is ideal).
5. Save your GIF
You can choose to save your GIF to your computer, or, in the case of GIPHY Capture, upload it straight to GIPHY’s online archive.
Tips for using GIFs on social media
The best social media platforms to use GIFs on are Facebook and Twitter—as of April 2018, Instagram only supports GIFs uploaded as video files.
Sharing a GIF on Facebook
Sharing a GIF on Facebook is easy: simply copy and paste the link to your GIF, wait for the preview to appear, and you’re golden. For best results, Facebook recommends:
- High quality animations
- Links ending with .gif
- GIFs with a file size less than 8 MB
- GIFs with less than 20 percent text on the image
- Avoiding flashy, excessively grainy GIFs (stay compliant with their advertising rules)
Sharing a GIF on Twitter
Here’s how to share a GIF on Twitter:
1. Type your Tweet into the text field (or a GIF URL), or click the Tweet button.
2. Click the camera icon and upload a GIF from your computer.
OR
Choose a GIF from Twitter’s built-in GIF search library, and click the GIF icon.
(Note: you’re limited to one GIF per Tweet)
3. Once you’ve selected your GIF, you’ll see it attach to your Tweet.
4. Click “Tweet” to post.
Now that you know how to share GIFs on Facebook and Twitter, here’s a few different approaches to incorporating them into your social media strategy.
1. Engage your audience
Remember, social media strategy isn’t all about conversions and sales. A huge part of the fun of social media is finding GIFs and sharing them with friends.
Humor is one of the most powerful ways to connect with your audience and keep them engaged. Pick GIFs that will resonate with your audience and make them feel personally connected to your brand.
And remember…
You don’t need to smother your GIFs in branding—it’ll just end up alienating your customers. Make sure your cultural references on social media are current, or have a timeless quality. You don’t want to look out of touch.
2. Enhance your how-to guides
GIFs are great for adding a visual dimension to instructions. InStyle’s 18 Ways to Wear a Scarf is an awesome example of the power of instructional GIFs. The GIFs in this article work so well because they show you what to do and what the end result looks like—all in less than five seconds!

The Huffington Post recently published a huge directory of exercise-related GIFs for the gym-shy among us. Each GIF shows a short loop of an exercise technique using the proper form. This saves you the hassle of clicking back and forth through YouTube videos (or dragging yourself to a personal trainer).
3. Promote your products
The shareable nature of GIFs—and their potential to go viral—mean they’re a powerful medium for advertising.
Last year, Converse and ad agency Big Spaceship partnered up for a back-to-school marketing campaign starring Millie Bobby Brown. The “First Day Feels” campaign included 32 reaction GIFs from the Stranger Things actress; they were wildly successful, generating over 276MM views and 11.5k shares between GIPHY and Tenor, and firmly establishing Converse as the back-to-school shoes brand of choice for tweens and teenagers.

4. Strengthen your visual branding
GIFs are definitely more stimulating than a static image, provided they’re used sparingly—it’s easy to go overboard and descend into a 1990s GeoCities nightmare (unless that’s what you’re going for). You can avoid this by choosing GIFs with muted colors and tones that don’t disrupt the browsing experience—like this cool, understated GIF from Nike.
You could also do the opposite and make an eye-catching GIF that’s totally extra.
Blackbox, a shipping company founded by the creators of Cards Against Humanity, recently added this insane GIF by pixel artist Paul Robertson to their website’s front page.
This overstimulating GIF celebrates what Blackbox is all about: shipping products from indie artists around the world, and having fun doing it. Robertson’s GIF was extremely well-received on Twitter, with over 850 retweets and 2,500 likes!
5. Make your data more visual
GIFs are also a good way to add dynamic elements to graphs and flowcharts. This makes them more visually interesting, showcasing the progression and aggregation of data, bringing it to life. I really liked this example from info we trust. that maps out the seasonal growth of 212 flowers in Jefferson’s Monticello garden.

This is a complex example, but there are simpler ways to visualize your data using GIFs. Last year, Google launched Data GIF Maker. All you need to do is plug in your numbers, and Google takes care of the rest!

However you choose to use GIFs in your marketing strategy—social or otherwise—make sure your approach is carefully considered and stays true to your brand values. And don’t forget to have fun with it!
You can add your newly created, hilarious GIFs to social media posts with Hootsuite. Easily manage your social channels and engage followers across networks from a single dashboard. Try it free today.
The post How to Make a GIF: The Complete Guide appeared first on Hootsuite Social Media Management.
Contributer : Hootsuite Social Media Management https://ift.tt/2HIzKWt

 Reviewed by mimisabreena
on
Thursday, April 19, 2018
Rating:
Reviewed by mimisabreena
on
Thursday, April 19, 2018
Rating:


No comments:
Post a Comment