


How to improve your character drawing
It takes time, patience, and plenty of hours following Photoshop tutorials to master the art of character drawing. During my early days at Disney, while working on films such as The Lion King, Mulan and Brother Bear, we would go through hundreds of variations of character designs. Because these films were hand-drawn, it wasn't too difficult to imagine how these rough designs would look in the finished film.
However, after the advent of films such as Toy Story and other computer animated works, it became more difficult for many artists working traditionally to present characters as they might appear in a final film.
One of my greatest discoveries when I first started working digitally was that I now had the ability to create an image that looked like a frame of finished film. I was able to convey texture, mood and lighting – all in one image. This has great value when trying to present ideas to film executives, art directors and the rest of the crew.
Read on to discover how I apply my traditional art background to create digital characters that look like they're ready to step from the screen. You can also watch the full tutorial above.
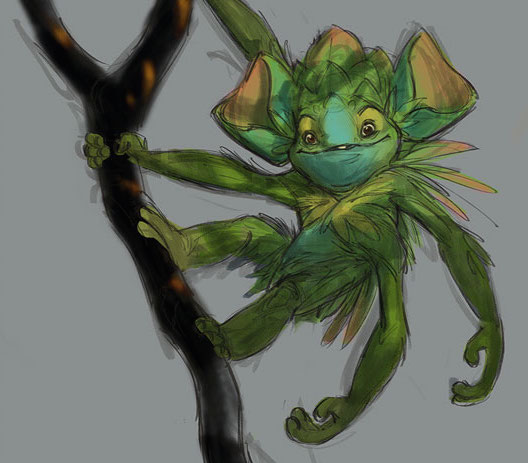
01. Create rough sketch
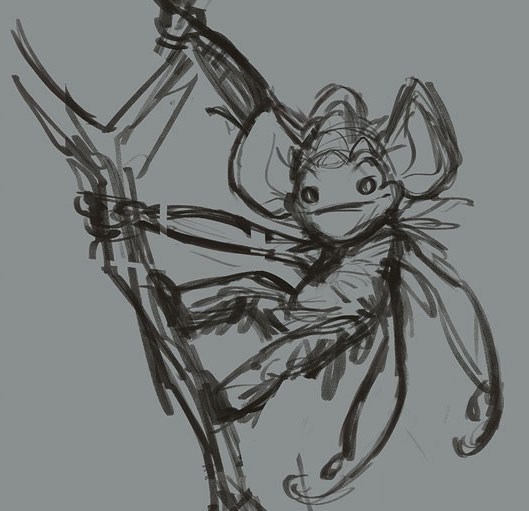
I fill a document with a mid-tone grey, which enables me to judge my values (light and dark) more accurately. I create a new layer above the grey background and label it Rough Drawing.
At this stage I draw loosely. Keeping it rough speeds things up and means I can try out new ideas without any restrictions. I explore proportions and spacing of features.
02. Refine the sketch
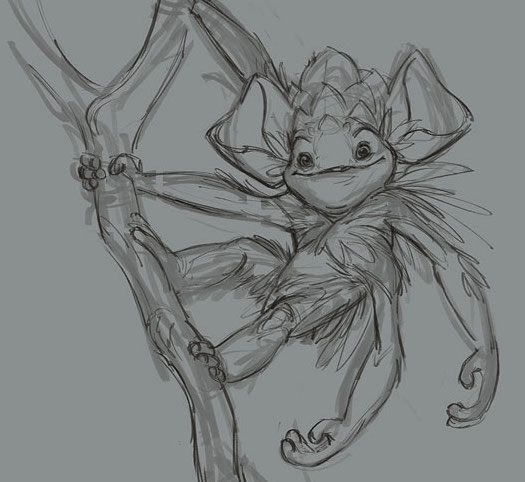
I reduce the Opacity of the rough to about 30 per cent and create a new layer labelled Refined Drawing. Now I find the details of the design – wrinkles or nose details, for example – that need defining.
This stage is key, because the drawing will serve as the blueprint for the rest of the rendering process. Good draftsmanship is the first step to great paintings!
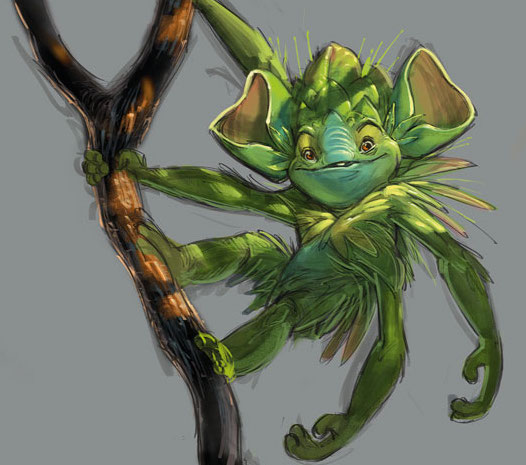
03. Bring in local colour
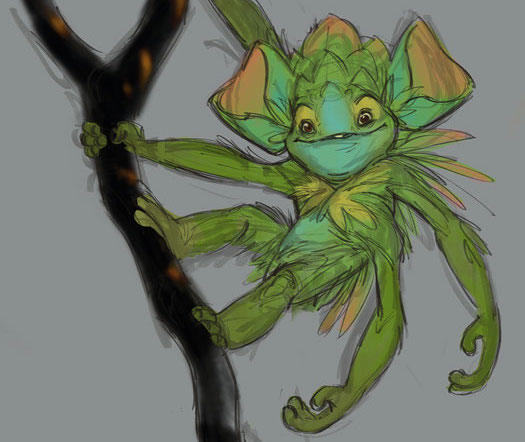
Local colour is the colour of an object without light or shadow. I create a layer under the drawing layers and call it Local Colour. For this stage I use a large, natural-looking brush. I start with green as my dominant colour and roughly lay it in.
Next, I add other varying colours to create interest. This stage can still be loose and quick. It's good to experiment! This is the foundation of the colour work that will follow.
04. Create the first shadow layer
I create a new layer on top of everything, call it Shadows and set its Blend mode to Multiply. This enables the local colour to show through the shadow layer. With a cool mid-tone colour selected, I begin to lay in the shadows.
To do this out of your head accurately you should be drawing from life as often as possible. I also stay loose and quick at this stage… but accurate.
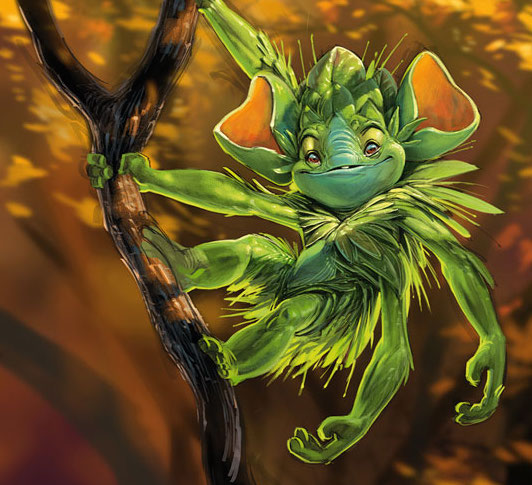
05. Paint direct light into the scene
Next, I create a new layer on top and name it Direct Light. It's important to remember colour temperature at this stage. I use a cool neutral colour for the shadows, but will be going warmer and more pure with the highlights.
I begin to paint in the light areas where the multiple light sources fall on the character, using warm greens and yellows. The creature is starting to take shape.
06. Consider reflected light
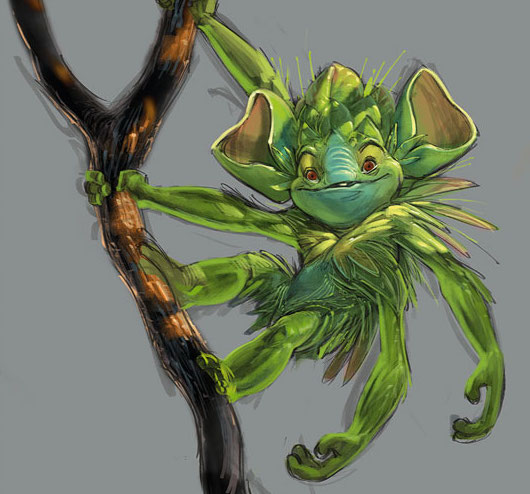
Within the shadow areas, light will bounce from lit areas and produce reflected light. I create a layer under the direct light layer and name it Reflected Light, then select a colour that's a little warmer and brighter than the surrounding shadow colour.
Subtlety is key: I want to only slightly adjust the values. I imagine the light source that's being reflected and model the form.
Next page: Add the finishing touches to your creature design
07. Make use of highlights
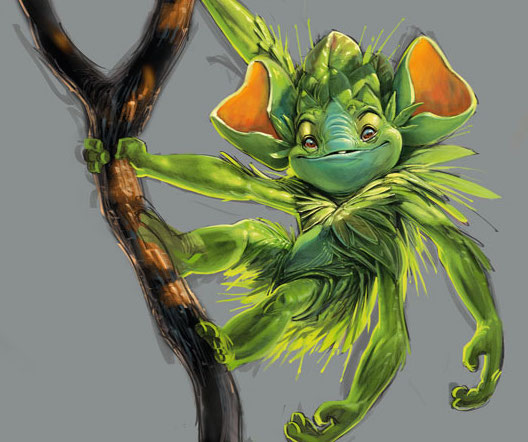
I create a new top layer and call it Highlights. It's time to shift back to the lit areas. (I jump from shadow to light and back again to keep everything balanced.)
I select the Color Picker, grab some direct light colour and brighten the colour up significantly. Then I paint areas that require a bright highlight. I also start adding rim lighting and some deeper shadows.
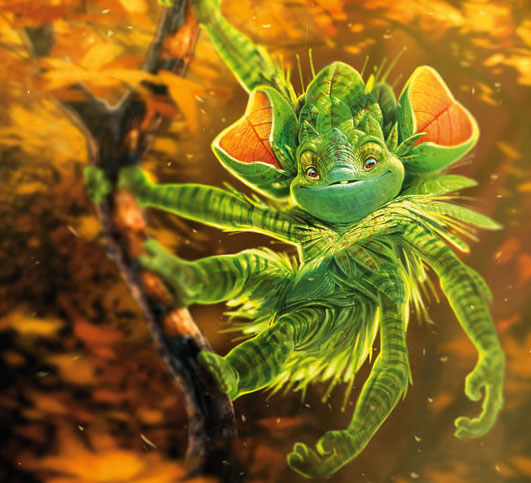
08. Use an autumnal background
Next, I create a layer underneath all layers and name it Background. Using a natural brush I very quickly start laying in some autumnal colours to complement the greens of the creature.
I treat it loose and abstract, and use darker values to ensure that the creature pops from the background. I then click Filter>Blur>Gaussian Blur, and set the blur at 25 pixels.
09. Introduce photo textures

Elephant textures make great creature skin. I select a section with the Lasso tool, drag it over to the illustration and reduce the Opacity to 30 per cent. Then I click Image> Adjustments>Exposure, increase the Gamma setting and adjust the Exposure to increase the contrast. I tweak these adjustments and the Opacity until the texture looks right.
10. Fit the texture to the creature
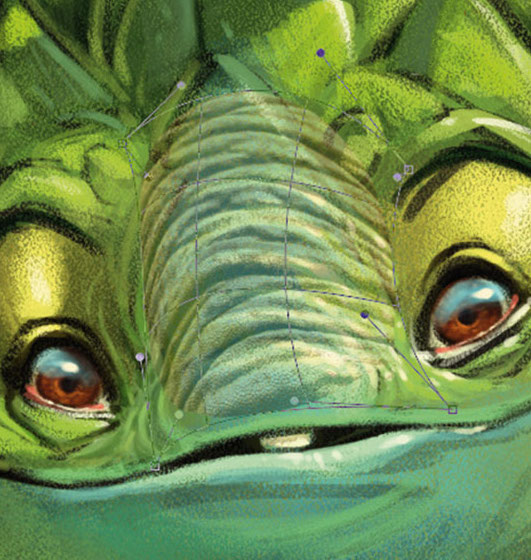
Next, I click Edit>Free Transform, resize the texture to fit and then select Edit> Transform>Warp. Now I can start to shape the texture to fit the creature's form.
I then repeat steps eight and nine to create a mosaic of textures on the creature. I experiment with a variety of textures – here I've used both elephant and leaf textures.
11. Add highlights to textures
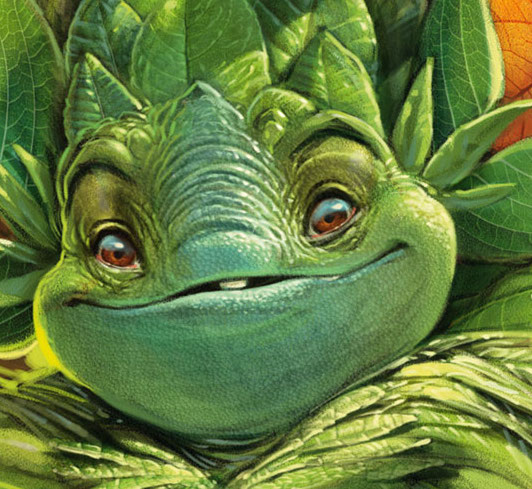
By the end of this stage, the textures should feel like a part of the creature. I start by creating a layer on top and calling it Texture Highlights. Then I select a fine brush and start to highlight over the textures where the light falls. This should be done tastefully. A little goes a long way here.
12. Apply markings
Now I create a layer under the Texture Highlights layer and call it Markings. I set the layer's Blend mode to Multiply.
Now using mid-tone greens and reds I go in and delicately add markings to the creature's skin. This stage adds interest and believability, and helps to describe the form of the creature.
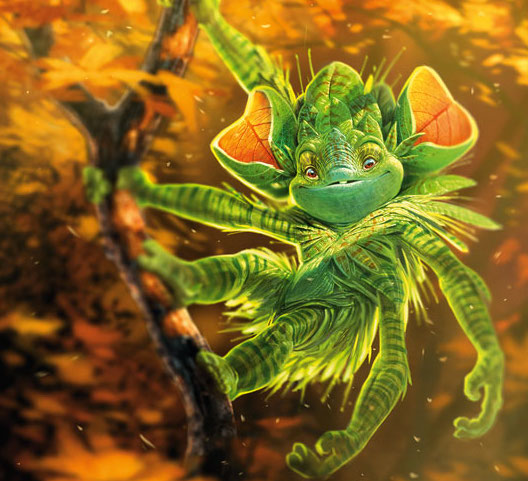
13. Depict foreground elements
I create a new layer on top and begin to loosely lay in foreground leaves and branches. Because this will be blurred there's no need to get detailed. However, I do build it up, using several layers.
Once everything is laid in, I combine the layers and go to Filter>Blur>Gaussian Blur. Then I set the blur to about 35 pixels. This will give the piece a nice feeling of depth.
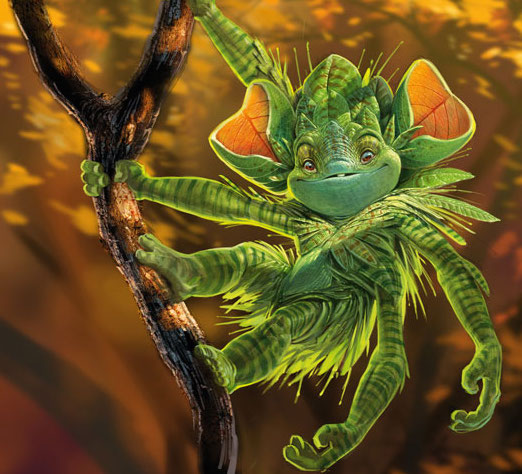
14. Adjust depth of field
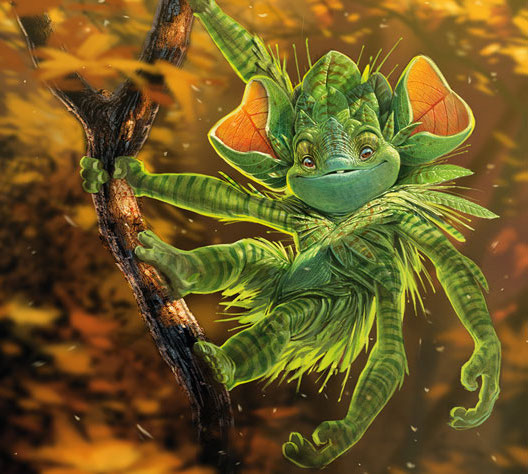
I copy all of the creature layers and combine them into one layer. Then I turn off all of the original individual layers. I select the Blur tool and pick the Airbrush setting. I set this to about 300 pixels and a strength of 50 per cent.
Now I go in and begin to blur out areas of the creature layer that I want out of focus. I do this to divert the viewer's attention to areas of interest, such as the face. This also gives the image a bit of a photographic look. Finally, I flatten the image and adjust the exposure and saturation to get the composition nice and bright.
This article originally appeared in ImagineFX. Subscribe today.
Related articles:
- How to draw a manga character
- The 60 best free Photoshop brushes
- How to draw and paint - 100 pro tips and tutorials
Contributer : Creative Bloq

 Reviewed by mimisabreena
on
Wednesday, May 02, 2018
Rating:
Reviewed by mimisabreena
on
Wednesday, May 02, 2018
Rating:


No comments:
Post a Comment