


How to Set Up Google Analytics in 5 Simple Steps
Knowing how to set up Google Analytics is the first step to understanding:
- Who your website’s visitors are
- What content they want to see from your business
- How they behave when browsing your site
The best part? Google Analytics is absolutely free.
And once you have it implemented, Google Analytics allows you to track and measure your business’ traffic goals and prove the ROI of your web and social media presence.
However, setting up Google Analytics can be hard (to put it mildly). Luckily for you, we have a step-by-step guide for digital marketers of any level to easily and painlessly set up Google Analytics.
Before we jump into how exactly to do that, let’s take a look at what makes Google Analytics so great.
Bonus: Get a free social media analytics report template that shows you the most important metrics to track for each network.
Why you need Google Analytics
Google Analytics is a robust and powerful tool that provides indispensable information about your website and visitors.
With more than 56 percent of all websites using Google Analytics, it’s also one of the most popular tools out there for digital marketers — and for good reason. The tool allows you to access a wealth of information regarding your site’s visitors.
Here’s just a few pieces of data you can get from Google Analytics:
- Amount of traffic your site gets overall
- The websites your traffic came from
- Individual page traffic
- Amount of leads converted
- The websites your leads came form
- Demographic information of visitors (e.g. where they live)
- Whether your traffic comes from mobile or desktop
It doesn’t matter if you’re a freelancer with a humble blog or if you’re a big company with a massive website and social media presence. Anyone can benefit from the information in Google Analytics.
Now that you know how great it is, let’s jump into exactly how to set up Google Analytics for your own website.
How to set up Google Analytics in 5 simple steps
Setting up Google Analytics can be tricky. However, once you have it set up, you stand to gain a ton of invaluable information very quickly.
This is pure 20/80 — with a small amount of work now you stand to gain disproportionate rewards later.
To set up Google Analytics, you simply have to follow these steps:
Step 1: Set up Google Tag Manager
Step 2: Create Google Analytics account
Step 3: Set up analytics tag with Google Tag Manager
Step 4: Set up goals
Step 5: Link to Google Search Console
Step 1: Set up Google Tag Manager
Google Tag Manager is a free tag management system from Google.
The way it works is simple: Google Tag Manager takes all the data on your website and sends it to other platforms such as Facebook Analytics and Google Analytics.
It also allows you to easily update and add tags to your Google Analytics code without having to manually write code on the back end—saving you time and a lot of headaches down the road.
Let’s say you want to be able to track how many people clicked on a downloadable PDF link. Without Google Tag Manager, you’d have to go in and manually change all the download links to do this. However, if you have Google Tag Manager, you can just add a new tag to your Tag Manager to track the downloads.
First, you’ll have to create an account on the Google Tag Manager dashboard.
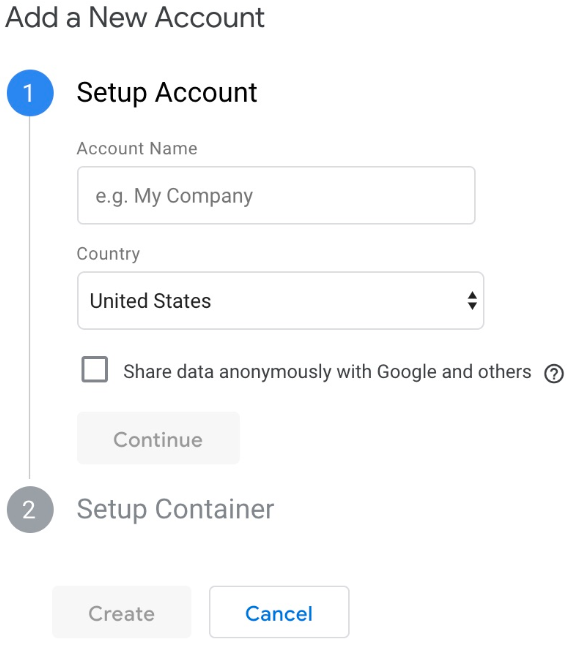
Enter in an account name and click continue.
You’ll then set up a container, which is essentially a bucket containing all of the “macros, rules, and tags” for your website, according to Google.
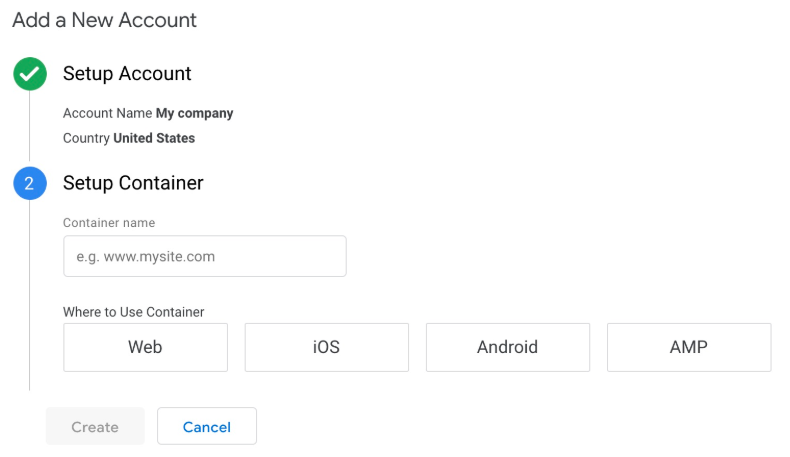
Give your container a descriptive name and select the type of content it’ll be associated with (Web, iOS, Android, or AMP).
Once that’s done, click create, review the Terms of Service, and agree to those terms. You’ll then be given the container’s installation code snippet.
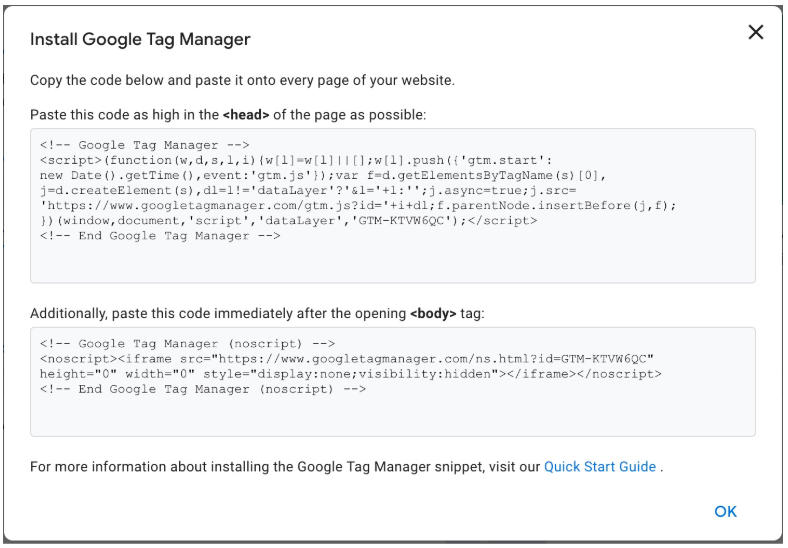
This is the piece of code you’ll be pasting into your website’s back end in order to manage your tags. To do that, copy and paste the two snippets of code onto every page of your website. As the instructions say, you’ll need to the first one in the header and the second after the opening of the body.
If you’re using WordPress, you can easily do this by pasting the two pieces of code into your WordPress theme.
Pro tip: You can make this process even easier by installing and activating the Insert Headers and Footers plugin for WordPress (or equivalent for other types of websites). This will allow you to add any script to the Header and Footer throughout your entire website, but you only have to copy and paste it once.
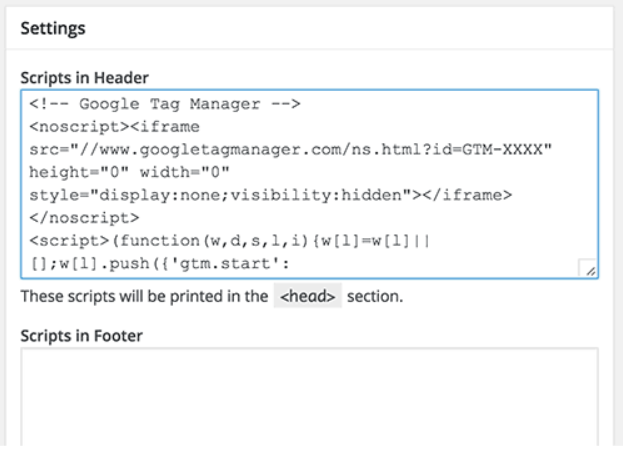 Source: WPBeginner
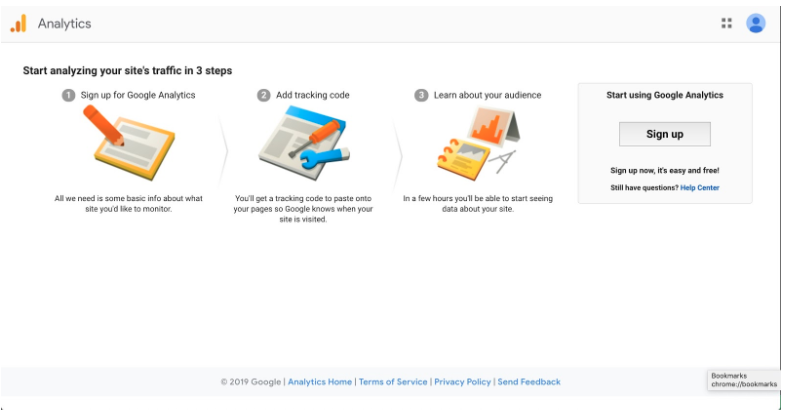
Step 2: Create a Google Analytics account
Like Google Tag Manager, you’re going to want to create a Google Analytics account by signing up on the GA page.
Enter your account and website name, as well as the website’s URL. Be sure to also select your website’s industry category and the time zone you want the reporting to be in.
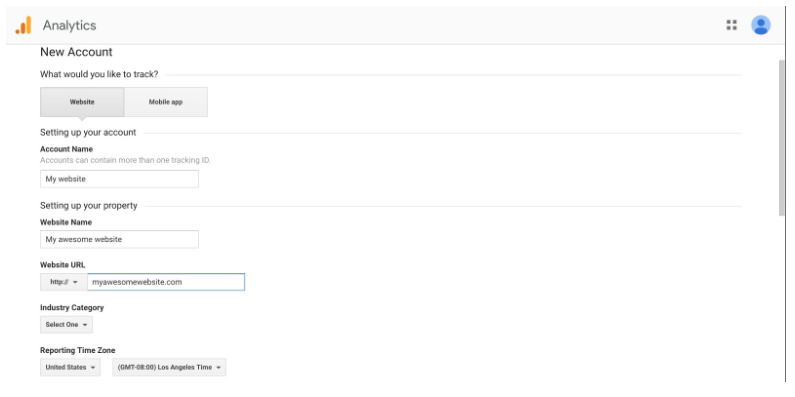
Once you do all that, accept the Terms and Services in order to get your tracking ID.
 Source: Google
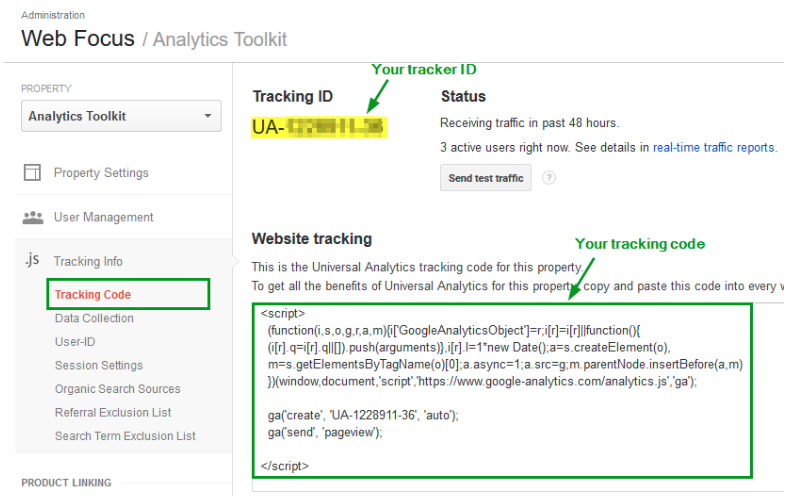
The tracking ID is a string of numbers that tells Google Analytics to send analytics data to you. It’s a number that looks like UA-000000-1. The first set of numbers (000000) is your personal account number and the second set (1) is the property number associated with your account.
This is unique to your website and your personal data—so don’t share the tracking ID with anyone publicly.
Once you have the tracking ID, it’s time to move onto the next step.
Step 3: Set up analytics tag with Google Tag manager
Now you’ll learn how to set up specific Google Analytics tracking tags for your website.
Go to your Google Tag Manager dashboard and click on the Add a new tag button.
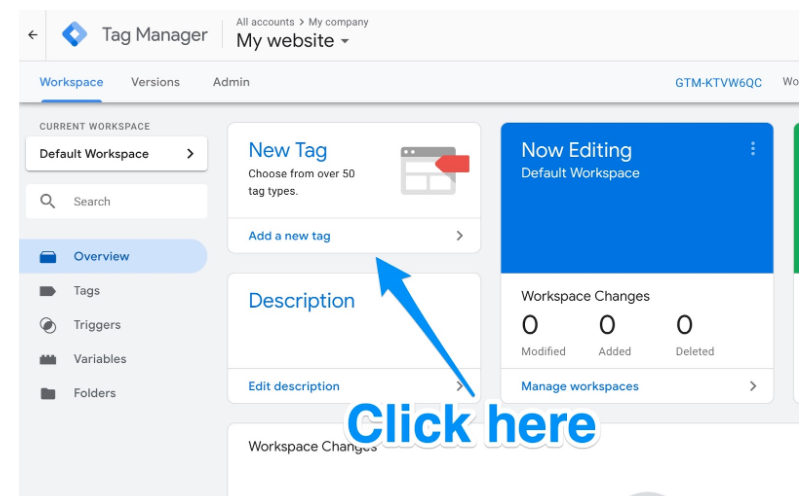
You will be taken to a page where you can create your new website tag.
On it, you’ll see that you can customize two areas of your tag:
- Configuration. Where the data collected by the tag will go.
- Triggering. What type of data you want to collect.
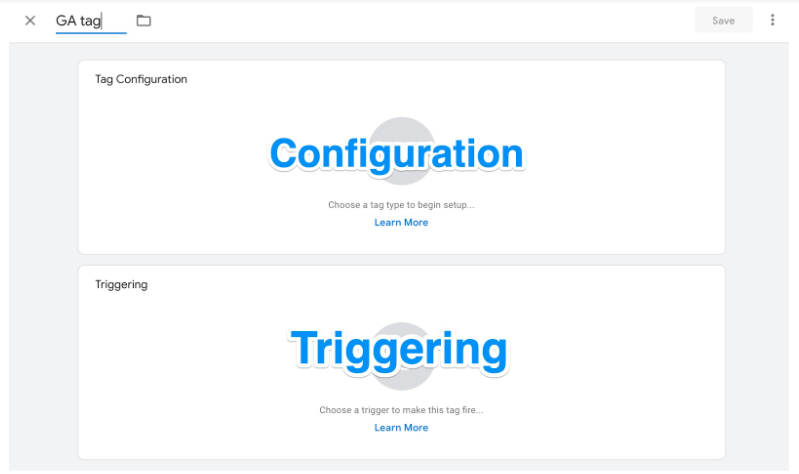
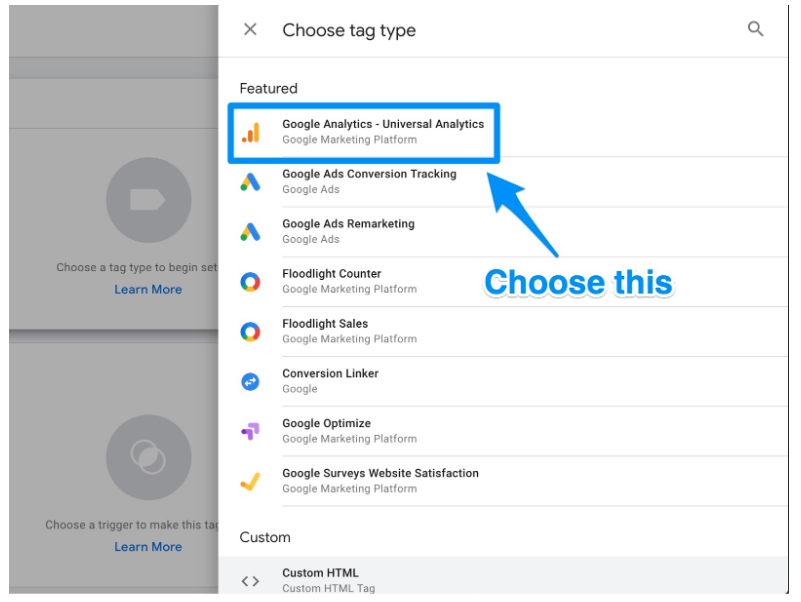
Click on the Tag Configuration button to choose the type of tag you want to create.
You’ll want to choose the “Universal Analytics” option in order to create a tag for Google Analytics.
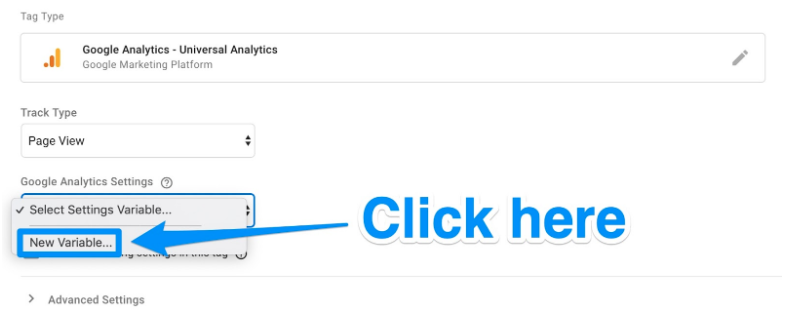
Now you can choose the type of data you want to track. Do that and then go to “Google Analytics Setting” and choose New Variable… from the dropdown menu.
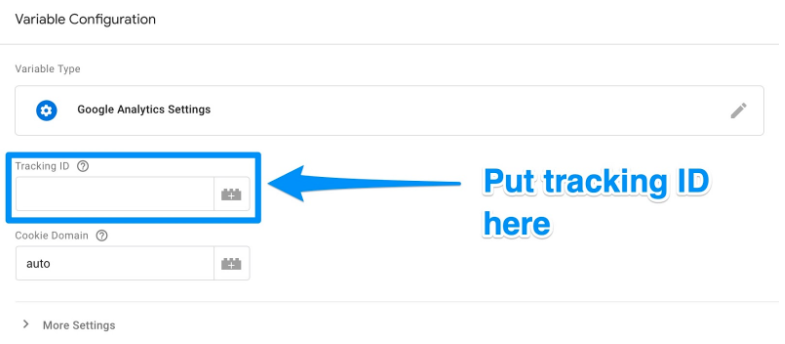
You’ll then be taken to a new window where you’ll be able to enter in your Google Analytics tracking ID. This will send your website’s data straight into Google Analytics where you’ll be able to see it later.
Once this is done, head to the “Triggering” section in order to select that data you want to send to Google Analytics.
As with the “Configuration,” click on the Triggering button in order to be sent to the “Choose a trigger” page. From here, click on All pages so it sends data from all your web pages.

When all is said and done, your new tag set up should look something like this:
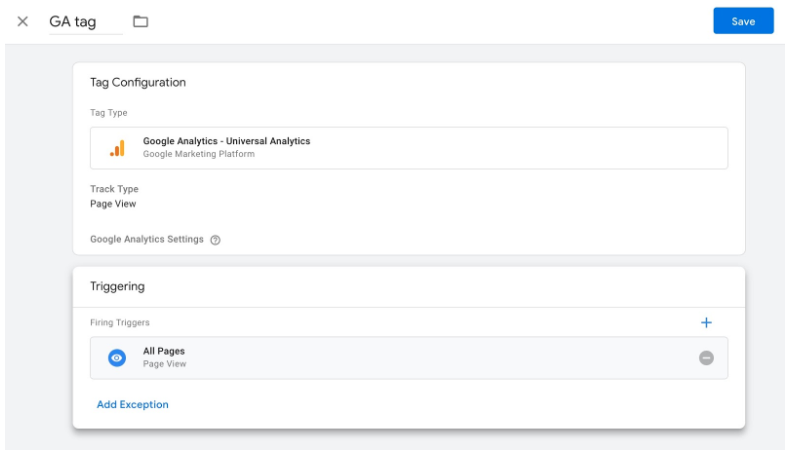
Now simply click Save and voila! You have a new Google Tag tracking and sending data to your Google Analytics page about your website!
We’re not done yet, though. You still need to set up your goals — which brings us to…
Step 4: Set up Google Analytics goals
While you probably know the key performance indicators for your website and business, Google Analytics doesn’t.
That’s why you need to tell Google what success looks like for your website.
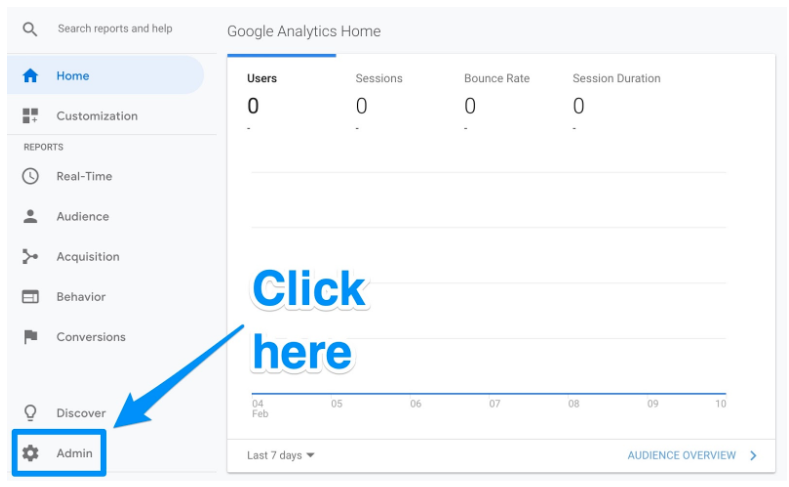
In order to do that, you need to set goals on your Google Analytics dashboard.
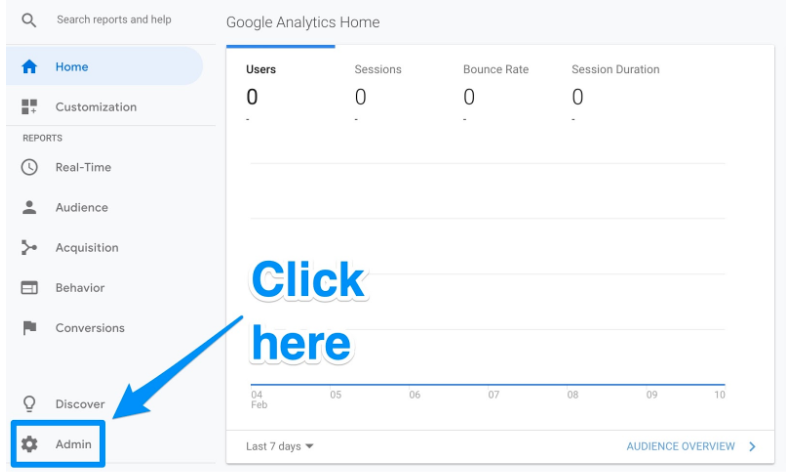
Start by clicking on the Admin button on the bottom left corner.
Once you do, you’ll be sent to another window where you’ll be able to find the Goals button.
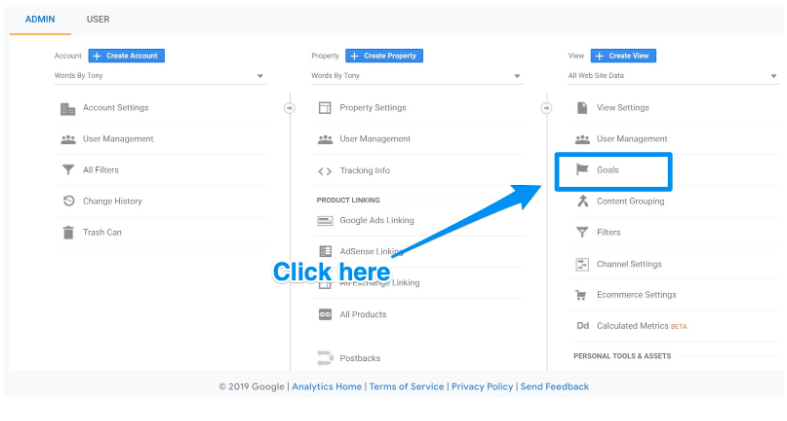
Click on that button and you’ll then be taken to the “Goals” dashboard where you’ll be able to create a new goal.
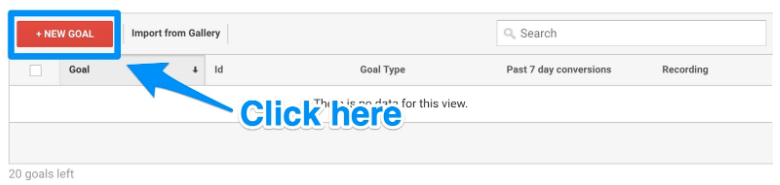
From here, you’ll be able to look through different goal templates to see if one matches your intended goal. You’ll also need to choose the type of goal you want. They include:
- Destination. e.g. if your goal was for your user to reach a specific web page.
- Duration. e.g. if your goal was for users to spend a specific amount of time on you site.
- Pages/Screens per session. e.g. if your goal was to have users go to a specific amount of pages.
- Event. e.g. if your goal was to get users to play a video or click on a link.
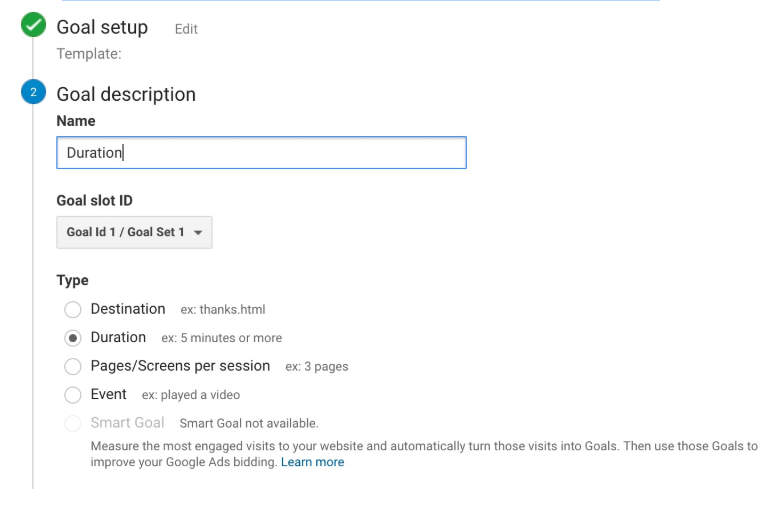
From there, you can get even more specific with your goals like choosing exactly how long users need to spend on your site in order to consider it a success.
Once you’re done, save the goal and Google Analytics will start to track it for you.
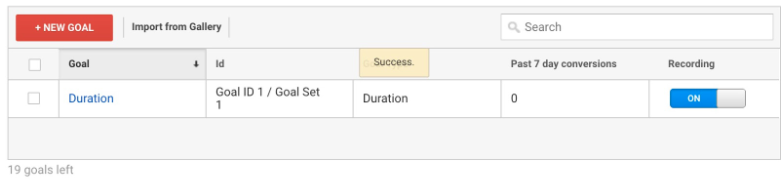
Remember: There is a wide variety of data you can track using both Google Tag Manager and Google Analytics. It’s easy to get lost in all the metrics you can track. Our recommendation is to start small with the metrics that matter most to you.
Step 5: Link to Google Search Console
Google Search Console is a powerful tool to help marketers and webmasters gain invaluable search metrics and data.
With it, you can do things like:
- Check your site’s search crawl rate
- See when Google analyzes your website
- Find out what internal and external pages link to your website
- Look at the keyword queries you rank for in search engine results
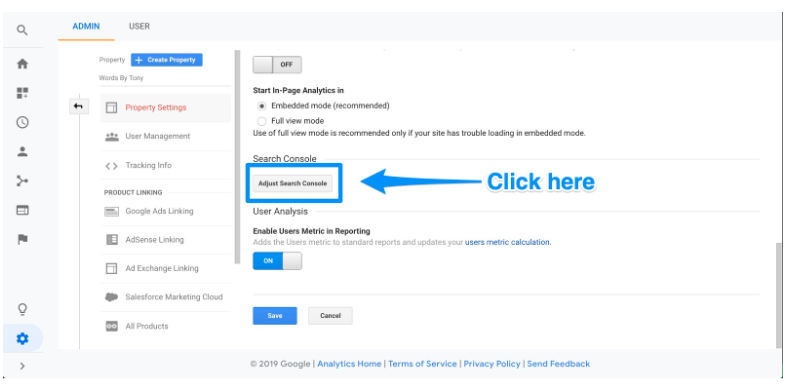
To set it up, click on the gear icon in the lower left hand corner of the main dashboard.
Then click on Property Settings in the middle column.
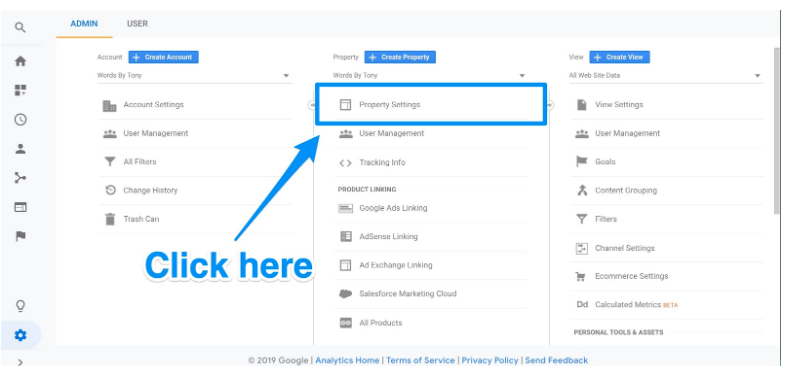
Scroll down and click on Adjust search console.
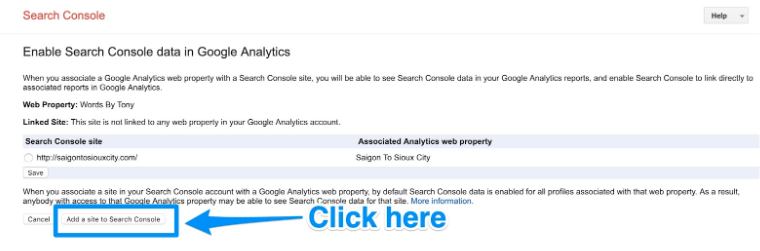
Here you’ll be able to start the process of adding your website to Google Search Console.

Click on the Add button and you’ll be redirected to this page. At the bottom, click on the Add a site to Search Console button.
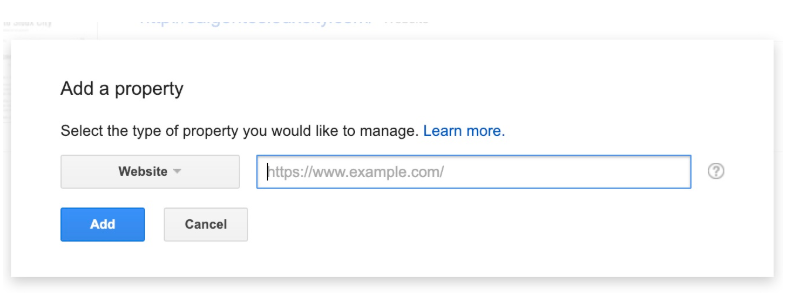
From here, you’ll be able to add a new website to Google Search Console. Enter in your website’s name and click Add.
Follow the directions to add the HTML code to your site. Once you’re done with that, click on Save and you should be taken back to Google Analytics.
Your data won’t appear right away—so be sure to check back later to see your Google Search Console data.
What next?
Now, there are a ton of different things you can do with Google Analytics. The world of data analysis and web marketing is literally at your fingertips.
Here are a few suggestions of things you can do:
Grant access to your team
If you’re working with a team, grant permissions to make sure other people can access the data on Google Analytics.
To add users, you simply have to follow these six steps from Google:
- Click on the gear icon in the lower left hand corner to go to the Admin dashboard
- In the first column, click on the User Management button
- Click Add new users
- Enter the email address for the user’s Google account
- Select the permissions you want to grant them
- Click Add
And voila! You should now be able to give others access to your business’s Google Analytics data.
Link Google Ads with Google Analytics
If your business uses Google Ads, you can now link that to your Google Analytics account so you can see “the full customer cycle, from how they interact with your marketer (eg seeing ad impressions, clicking ads) to how they finally complete the goals you’ve set for them on your site (eg making purchases, consuming content),” according to Google.
To link the two accounts, follow the nine steps below:
- Click on the gear icon in the lower left hand corner to go to the Admin dashboard
- In the “Property” column, click on Google Ads Linking
- Click on New Link Group
- Click on the Google Ads accounts you want to link with Google Analytics
- Click Continue
- Make sure that linking is on for each property you want to see data from Google Ads
- Click Link accounts
With your accounts linked, you’ll have even greater access to information you need to determine your ad campaign’s ROI.
Set up views
Google Analytics allows you to set up your reports so you only see the data and metrics that matter to you through “views.”
By default, Google Analytics gives you an unfiltered view of each website in your account. That means if you have, say, three websites associated with you Google Analytics, it’ll all be sent to one property where the data is aggregated.
However, you can set it up so you only get the data you want to see. For example, you could have a view that helps you see only organic search traffic. Or maybe you want to see only social media traffic. Or you want to see conversions from you target market.
All can be done through views.
To add a new view, simply follow the steps below:
- Click on the gear in the lower left hand corner to go to the Admin dashboard
- In the “View” column, click Create new view
- Select “Web Site” or “App”
- Enter a name for the view describing what it’s filtering for
- Choose the “Reporting Time Zone”
- Click Create View
Once you create your view, you’ll be able to edit the view settings to filter exactly what you want to see.
Drive more traffic to your website from social media using Hootsuite. From a single dashboard you can manage all your social media profiles and measure success. Try it free today.
The post How to Set Up Google Analytics in 5 Simple Steps appeared first on Hootsuite Social Media Management.
Contributer : Hootsuite Social Media Management https://ift.tt/2TMXoKH

 Reviewed by mimisabreena
on
Wednesday, March 20, 2019
Rating:
Reviewed by mimisabreena
on
Wednesday, March 20, 2019
Rating:


No comments:
Post a Comment