


Create an interactive parallax image
Parallax scrolling is no longer the guaranteed attention-grabber it used to be, but there are other ways of using parallax techniques to engage your visitors and enhance your user experience.
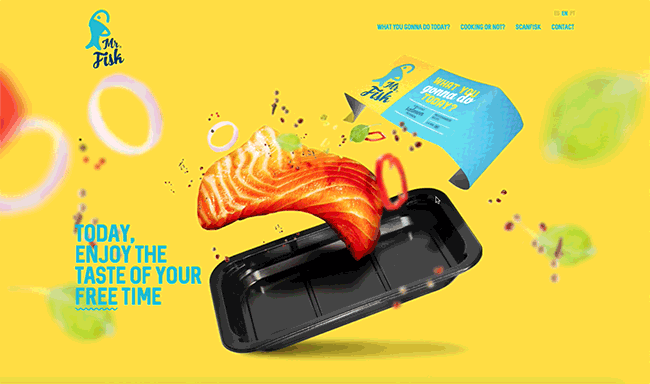
Take a look at Mr Fisk's site, designed by BMO, and you'll notice a different sort of parallax going on: its brightly-coloured main image moves in 3D, in response to your mouse movements.
It's an impressive effect that's not too hard to implement; simply follow these steps to give your site an eye-catching sense of depth.
01. Initiate HTML
The first step is to define the HTML document, which consists of the HTML container for storing the head and body sections. While the head section is primarily responsible for loading the external CSS and JavaScript resources, the body section will store the content elements to be created in step 02.
02. Content elements
The technique will allow any content container using the data-parallax attribute to display the effect. Each first level child element will display with the parallax presentation. This example sets three child layers for the parallax, but you can add more if you want to. You can also add content to these layers such as text or images; PNG or SVG with transparency will work best.
03. Parallax container style
Create a new file called 'styles.css'. The first set of rules in this file sets the default size of the parallax container and its position mode. It's important to use relative positioning so that the child elements can be placed in relation to wherever the container is located. The width and height are set to cover the full screen to allow for maximum interactivity.
04. Parallax children
Each of the first level elements inside the data-parallax container are sized and positioned to appear centrally. Along with parents relative positioning, percentage is used as the measurement unit, allowing the sizing and positioning to be placed in relation to the parallax container. For this example, a transparent red background is used to demonstrate the effect – you can replace this with PNG or SVG image of your choice using @background: url ("your image here").
05. Initiate the JavaScript
Create a new file called 'code.js'. JavaScript will be used to control responses to the user's mouse interactions. We don't want the JavaScript to run any of the JavaScript code until the page has fully loaded, hence the code for steps 06 and 07 placing a function triggered by the load event, which activates when the window has completed loading.
06. Node search
The first activity of JavaScript to execute immediately after the page is ready is to find all of the parallax layers. Firstly, the parallax containers are found, followed by their children. Each child has an index number applied to them under the 'data-index' attribute.
07. Parallax listeners
The final step is to apply an event listener for any mouse movement occurring over the parallax container. Any such actions trigger a feature to calculate the new positions of the parallax layers based on the mouse position and the data-index attribute defined in step 06 – resulting in each layer updating at different paces. The result of each calculation is applied to the layers via the style attribute.
This article was originally published in issue 272 of creative web design magazine Web Designer. Buy issue 272 here or subscribe to Web Designer here.
Related articles:
- Animate SVG with JavaScript
- Create liquid effects with WebGL
- 10 ways to avoid cross-browser compatibility issues
Contributer : Creative Bloq

 Reviewed by mimisabreena
on
Tuesday, May 15, 2018
Rating:
Reviewed by mimisabreena
on
Tuesday, May 15, 2018
Rating:


No comments:
Post a Comment