


Create breathtaking photos with powerful AR tools in Luminar 4
If you’re looking for ways to make your imagery stand out in the crowd, look no further. Photo editor Luminar 4's revolutionary tools and AI technologies offer unlimited creative options, allowing you to take your photography to new heights.
For a start, Luminar 4 removes the often painstaking process of selections and masking, with the software able to automatically identify, mask and blend objects in an image. Then there’s Luminar 4’s amazing AI Sky Replacement and Portrait Enhancer tools, both of which offer the ability to add and create incredible effects with ease.
If that wasn’t enough, Luminar 4.2 adds another impressive feature: AI Augmented Sky feature, a tool that can add all manner of objects to an already existing image. From mountains and birds, to clouds and planets, the AI Augmented Sky feature’s tools and capabilities will soon have you hooked.
Let’s take a closer look at AI Augmented Sky’s toolset and how it works in practise.
AI Augmented Sky controls
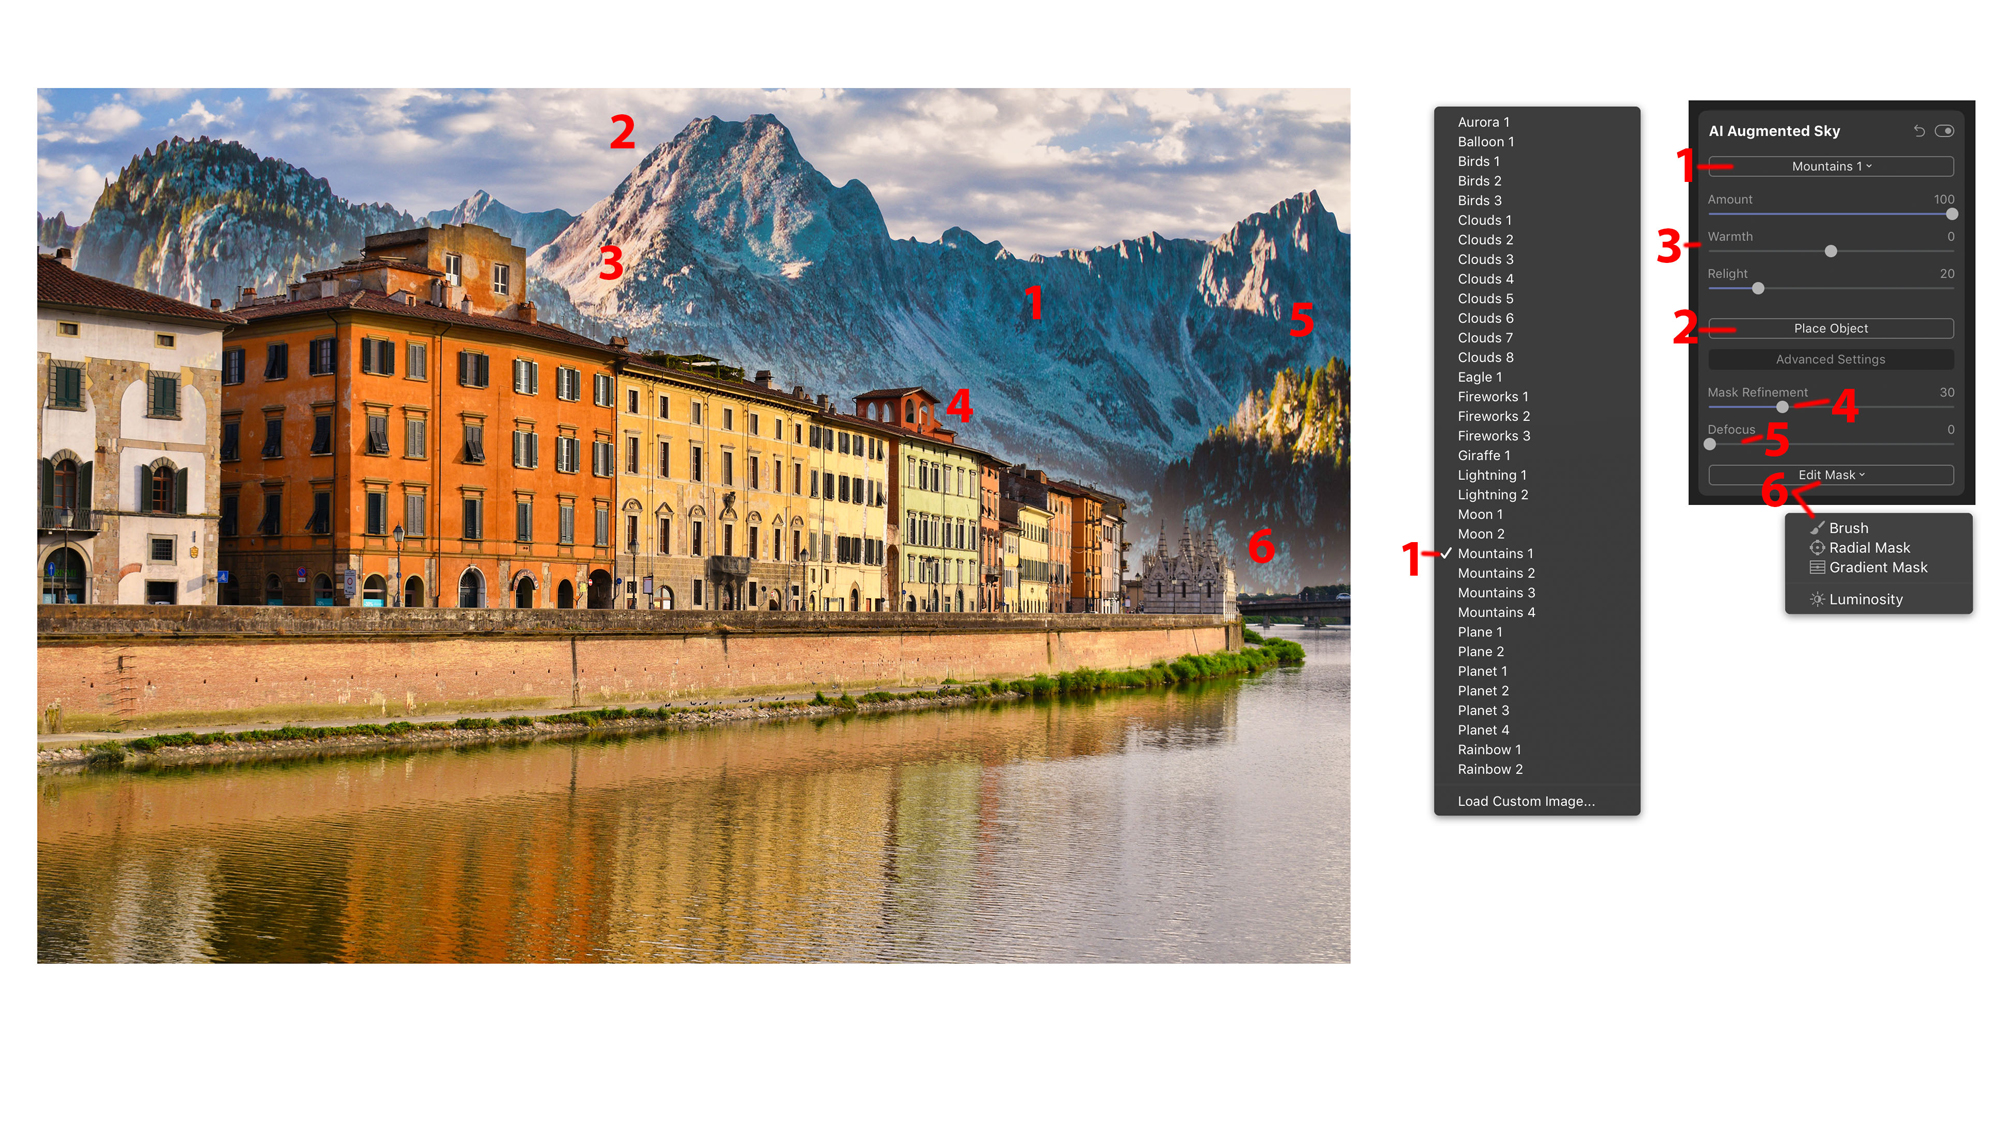
Click image to enlarge
01. Object selection
Here you can pick from a variety of objects for your augmented sky. Want to add a bird or mountain to your backdrop? Simply choose from the drop-down menu and voila!
02. Place Object
Once you’ve chosen an object, click here to select and reveal display handles for moving, resizing and rotating as required.
03. Sky effects
These controls will help your chosen objects fit your original scene as naturally and effectively as possible. Use Amount to control the transparency of an object, Warmth for the colour balance and Relight to match the object’s lighting to that of the main image.
04. Mask Refinement
Luminar 4 does a remarkable job at selecting and fitting images together seamlessly, however the mask refinement tool is available should complex outline masks need any further fine adjustments.
05. Defocus
If you’re shooting a close-up that requires the background to be out of focus, the Defocus slider can help ensure the object of interest is super-sharp.
06. Edit Mask
Luminar 4 does an amazing job at joining the sky to even the most complex horizon, but if you’ve got some poorly defined detail, this button will allow you to manually mask and tweak the affected areas.
4 simple steps to add objects to a sky
Now that you’re accustomed to AI Augmented Sky’s toolset, let’s give them a go. Here’s a simple step-by-step guide on how to add lightning to this nightscape.
01. Open the AI Augmented Sky tool panel
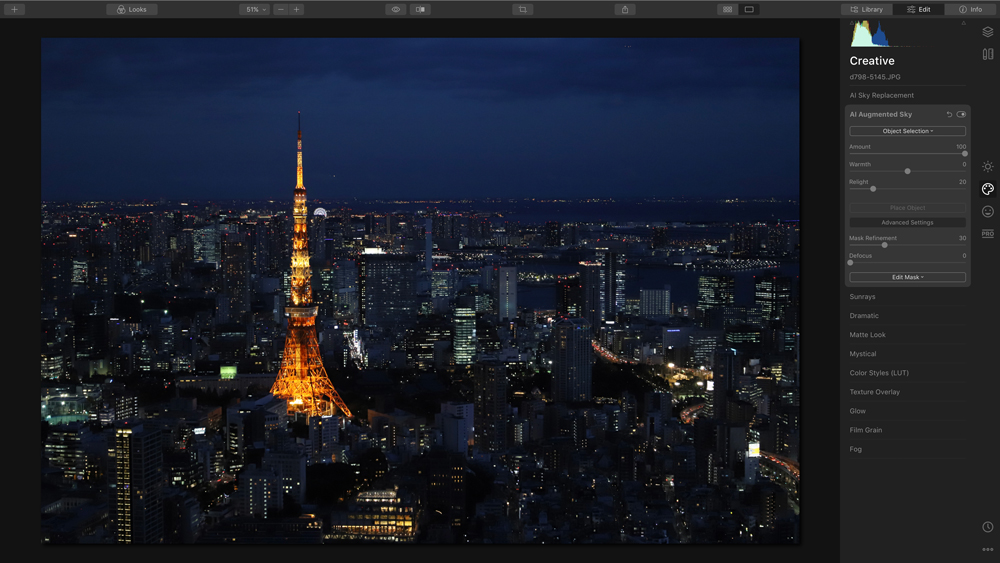
Luminar 4 consists of four key workspaces, each of which is displayed via an icon on the right-hand side of the screen. Click the Creative workspace to access the AI Augmented Sky tool.
02. Add lightning
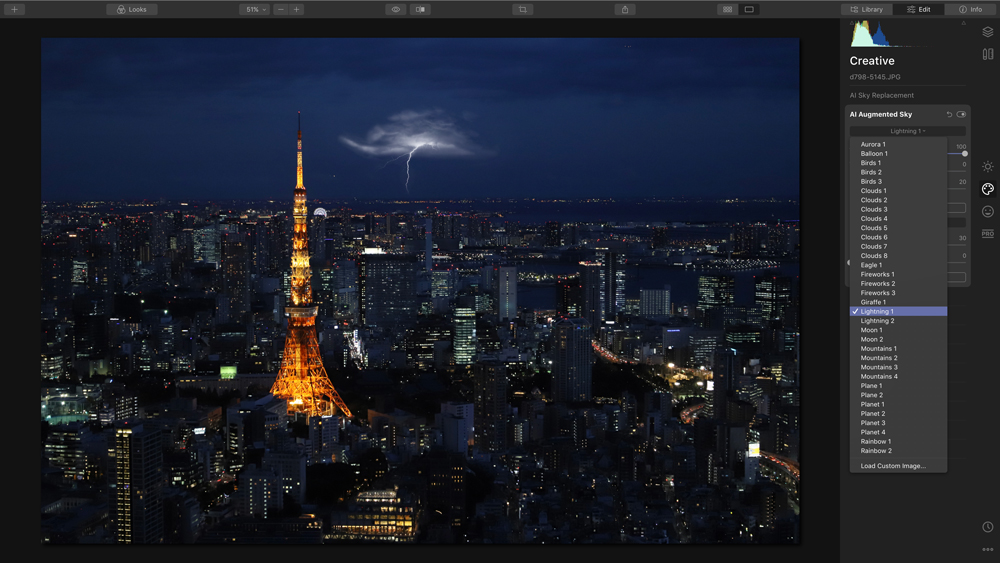
Yes, it’s that simple. Choose lightning from Luminar 4’s long drop down list of objects and the AI Augmented Sky tool will add it seamlessly. Luminar 4 also enables you to add your own custom objects – simply choose the ‘Load Custom Image’ option and you’re good to go.
03. Reposition
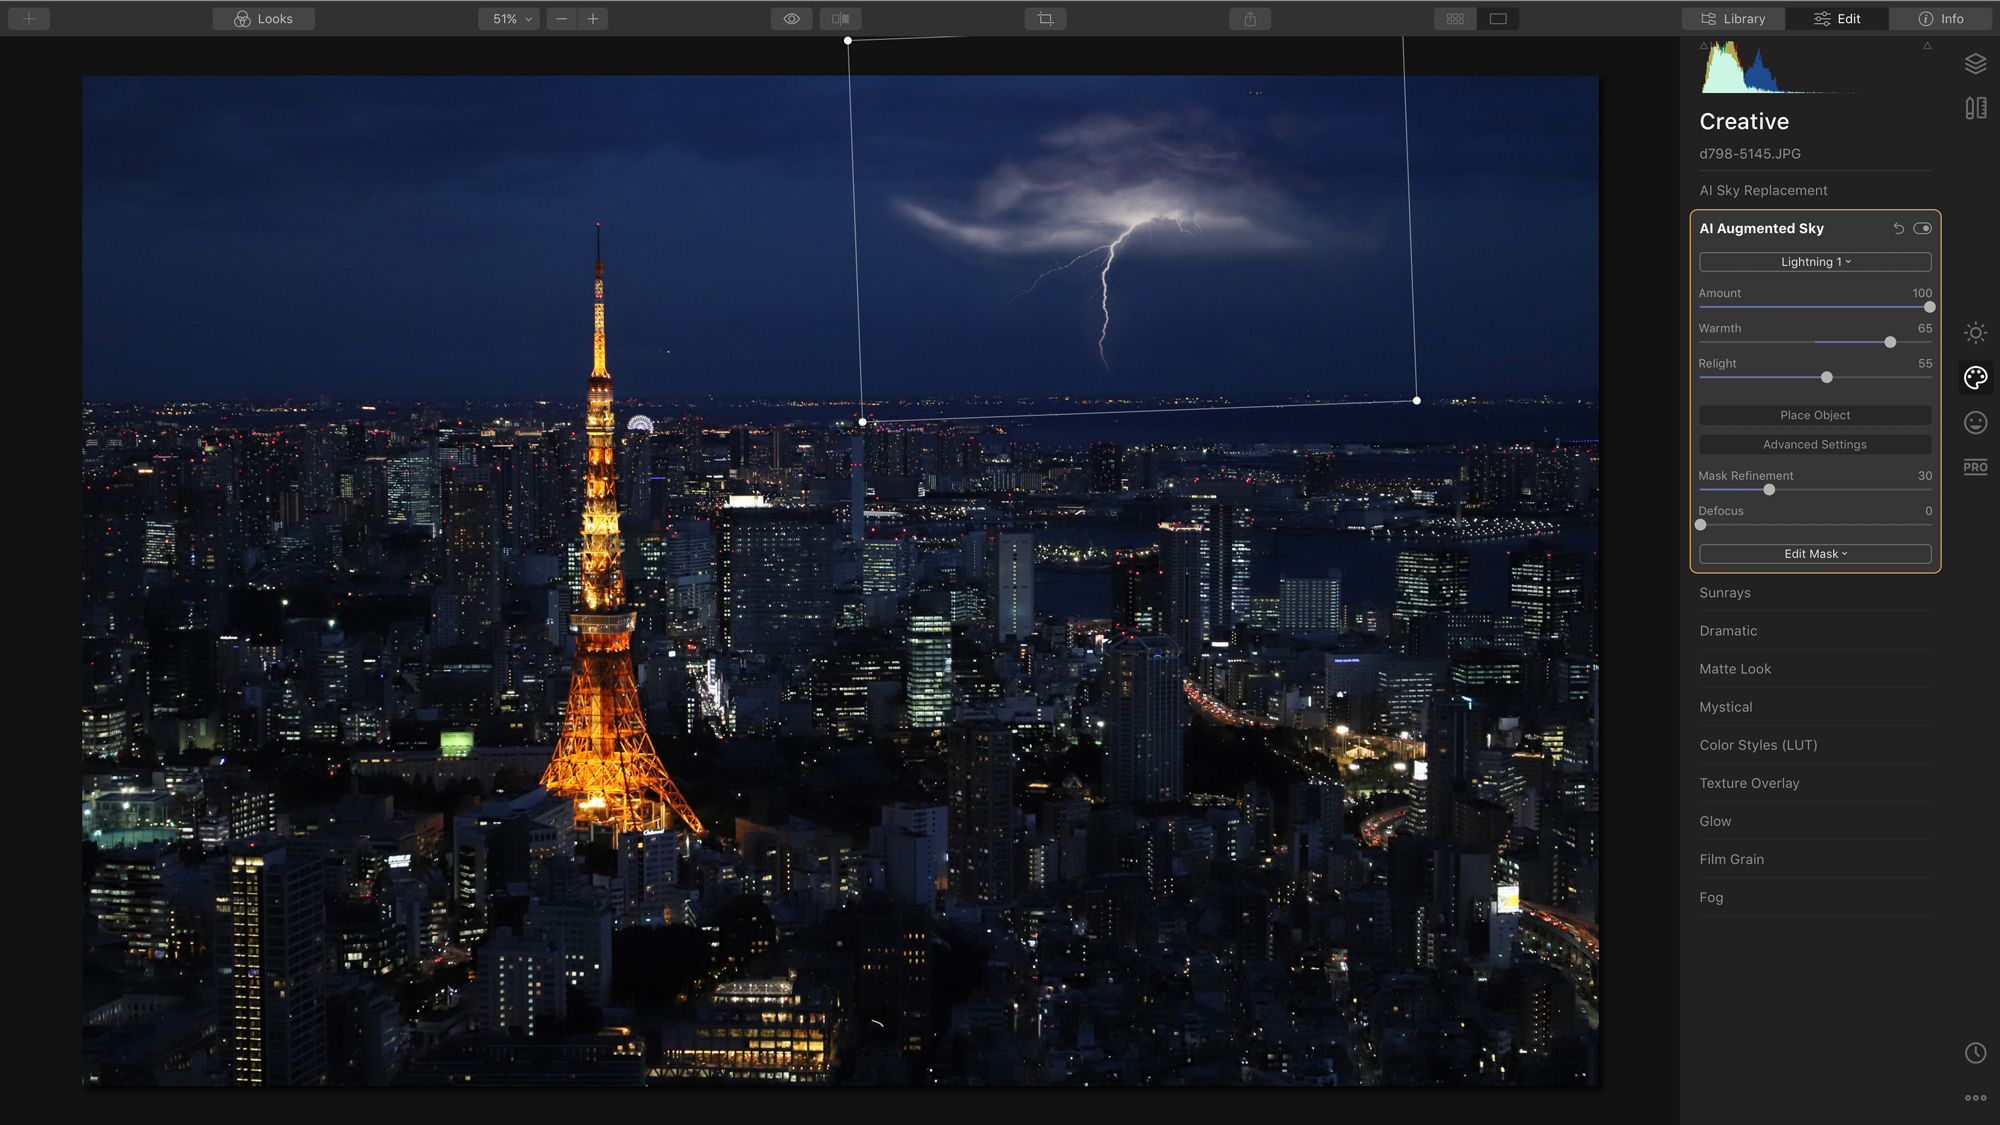
Click image to enlarge
If you’re not happy with Luminar 4’s automatic placement of the lightning, you choose a more suitable position using the Place Object button. This allows you to not only reposition as you see fit, but resize, rotate and even adjust brightness and warmth for a more authentic fit.
04. Finishing touches

Teaming up Luminar 4 tool’s can create truly show-stopping results. The combined power and feature set of its AI Augmented Sky tool and Smart Contrast can work wonders for adding those extra finishing touches. The Smart Contrast slider can enhance your new sky by preserving details and tones while still giving the final image that ‘edge’. To access this tool you’ll need to head to the Light panel in Luminar 4’s Essentials workspace.
How to get a copy of Skylum Luminar 4
Want to give Luminar 4 a try? You can now download a free seven-day trial, for both macOS and Windows, from the Skylum website. And if you decide to go ahead and buy Luminar 4, you can use the exclusive discount code CB to save £10/$10 on the full purchase price.
Contributer : Creative Bloq

 Reviewed by mimisabreena
on
Monday, May 18, 2020
Rating:
Reviewed by mimisabreena
on
Monday, May 18, 2020
Rating:


No comments:
Post a Comment