


How to Edit Instagram Photos Like a Pro: A Step-by-Step Guide
If you scroll through your Instagram feed, you’ll probably notice that all your favorite accounts have something in common: captivating images that catch your attention. So it’s no surprise that quality photos are the most important piece of any Instagram strategy.
Fortunately, you don’t need to be a professional photographer to produce stunning images for Instagram.
All you need is your smartphone camera, a few editing tools, and a little practice.
In this post, you’ll learn how to edit Instagram photos to grow your audience and establish a compelling brand aesthetic. You’ll also get a breakdown of some of the best photo-editing apps that can take your images (and engagement) to new heights.
Bonus: Download a free checklist that reveals the exact steps an adventure photographer used to grow from 0 to 110,000 followers on Instagram with no budget and no expensive gear.
How to edit Instagram photos in 6 easy steps
1. Start with a quality shot
The ultimate shortcut to crafting a great Instagram post is to begin with a quality photo. Try shooting in natural light, and take a bunch of shots. That way you have choices.
The HDR mode on your smartphone camera is your friend when shooting in dim light, close up, or outdoor portraits.
If you’re strapped for time or inspiration, try customizing stock photography. There’s a whole wide world of free, quality stock photography out there to choose from. Going this route can be a smart choice for brands who don’t have physical products ready for release, or smaller companies who don’t have a budget for professional photos.
Pro tip: Start with a photo that’s sized for Instagram. If your photo is too small, it may appear blurry or grainy, no matter how much you edit it. Photos that are 1080 pixels wide will look best. Instagram will crop your photo as a square by default, but you can adjust it to its full width or height if you prefer.
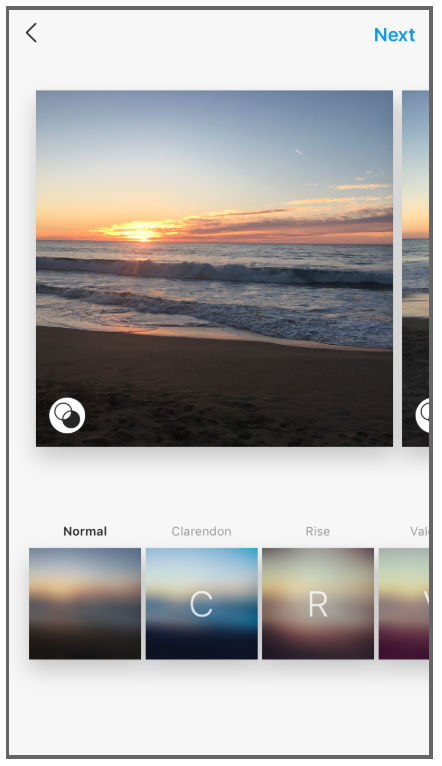
2. Choose your filter
Filters are like ice cream flavors: tastes vary by person, but some are more popular than others. And when it comes to figuring out your own preferences, the tried-and-true method is to sample widely.
According to a U.S.-wide study, the best Instagram filter is Clarendon. It offers brightening and highlighting effects that flatter most pictures, contributing to its universal appeal. (The fact that it’s the first one on the list might also have something to do with it!)
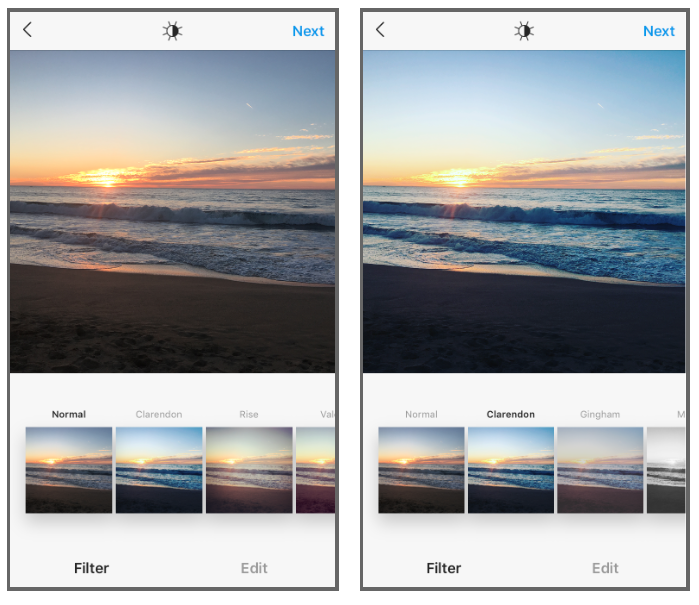
Runner-up favorites include Gingham, Juno, and Lark.
Some filters add a vintage flavor with vignette or fading effects.Others enhance brightness or warmth.
Explore the range of options to find a filter that complements your brand aesthetic. Or, keep it simple and go with the one that catches your eye.
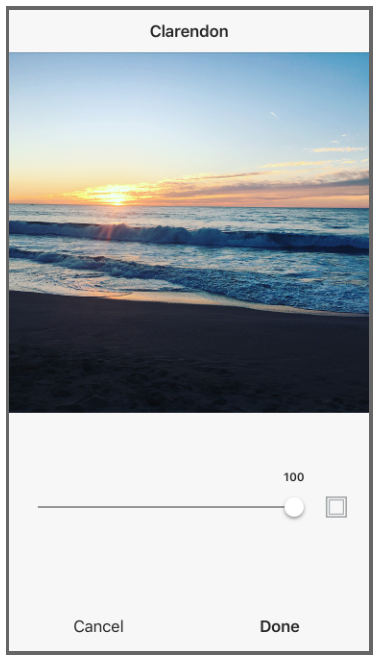
Pro tip: You can adjust the intensity of any filter by tapping it a second time and adjusting the sliding scale from 0 (no effect) to 100 (full effect).
Once you’ve found your favorite filter, use it on all of your posts to establish a distinctive look for your feed (like celebrities do). This can help build and reinforce your brand identity. Sixty percent of top brands use the same filter on each post for that reason.
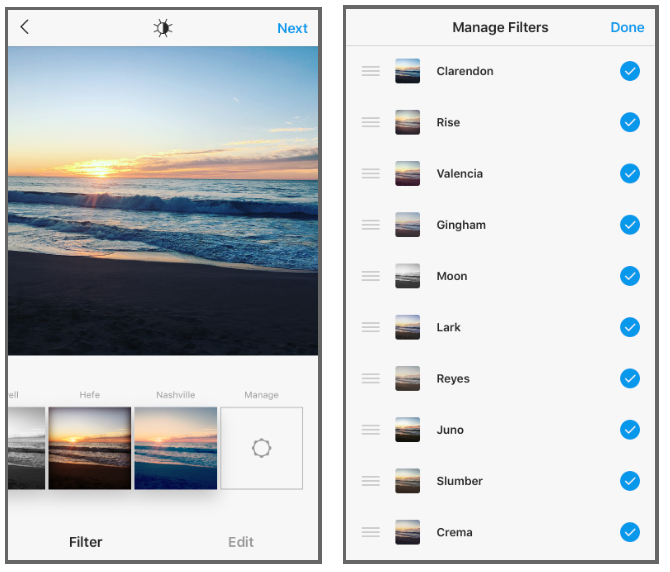
Another tip: Reorder your Instagram filters (or remove ones you never use) by scrolling to the end of the list and clicking “Manage.” Then simply drag the filters to your preferred order.
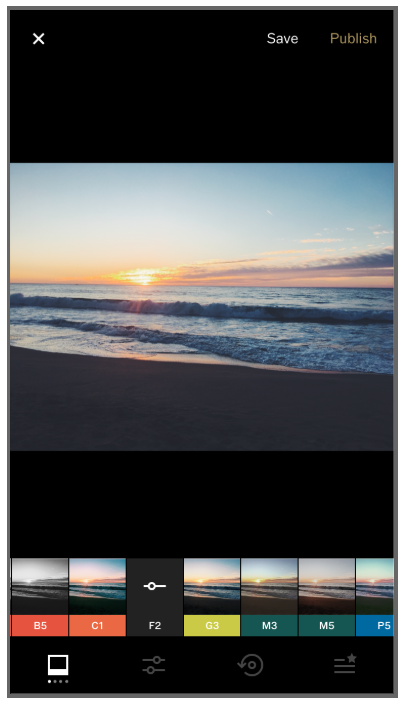
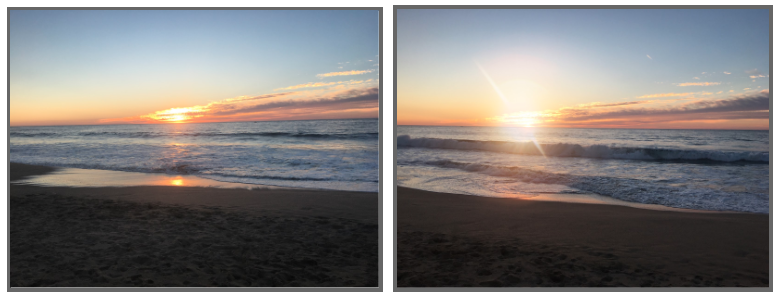
3. Adjust the Lux setting
Once you’ve applied your filter, you can adjust the Lux setting by clicking on the sun icon above your photo.
Lux adjusts the contrast and exposure of photos, adding dimension and making the features of the photo pop. It’s sort of like contour, but for your pictures instead of your face. This can be particularly helpful for enhancing underexposed photos.

Adjust the Lux by sliding the scale. Moving it to the right increases contrast and intensity, and moving to the left decreases them.
Above, you can see the effect of Lux on this beach photo: brighter colors and sharper contrast.
4. Adjust your other settings
Next, tap the edit button on the bottom-right to adjust other settings.
I always check the alignment, and if you’re the kind of person who is driven crazy by a crooked painting on a wall, you should too.
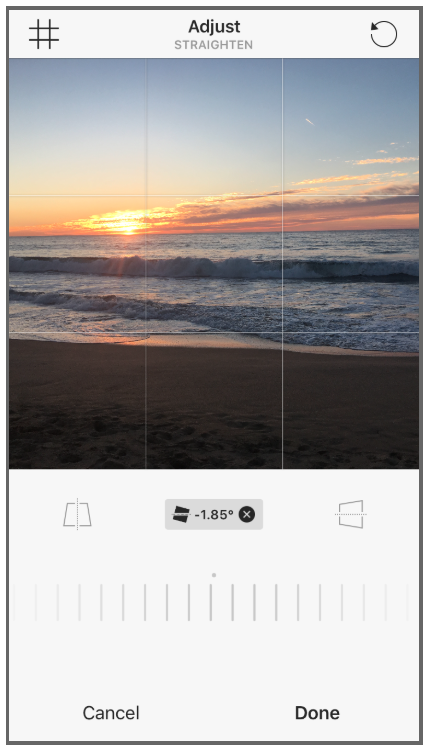
The edit options allow you to create a sort of custom filter. You can:
- Add a vignette effect for a Polaroid-like photo
- Adjust the structure setting to increase contrast and sharpness (two effects that evoke film photography)
- Scale up saturation for vivid colors, or tone it down to create a faded effect
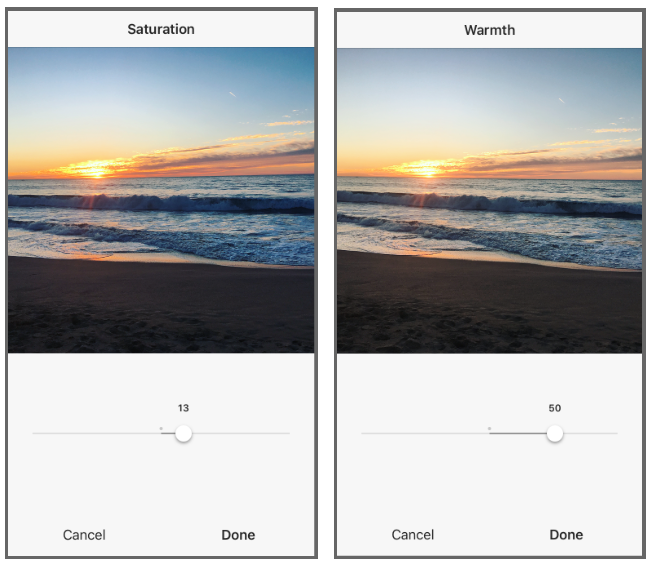
Before you get carried away, remember Coco Chanel’s timeless advice to take one accessory off before leaving the house.
You don’t need to pile on every effect. You just want to enhance what’s already eye-catching about your photo.
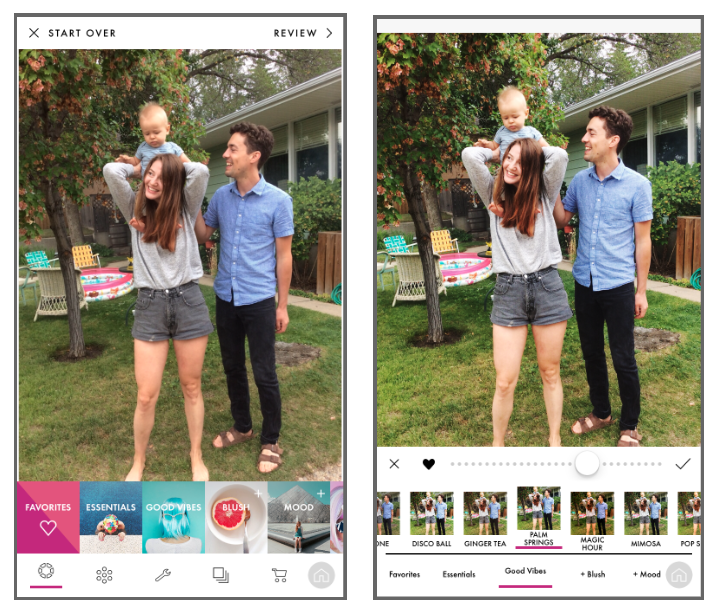
5. Tweak individual photos in a multi-image post
If you’re sharing multiple photos in a single post, you can edit each one separately. Tap the Venn diagram icon in the bottom-right corner of the photo to bring up individual editing options.
If you don’t do this, Instagram will apply your edits to every photo the same way. If your photos were taken in different conditions, or feature different subjects, editing them individually is worthwhile.
6. Post to Instagram now, or save for later
Not ready to post your picture yet? Click ahead to the next screen where you would write your caption, then click back to your edited photo, and press the back arrow again. Instagram will ask if you want to save your image, including all your edits, as a draft.
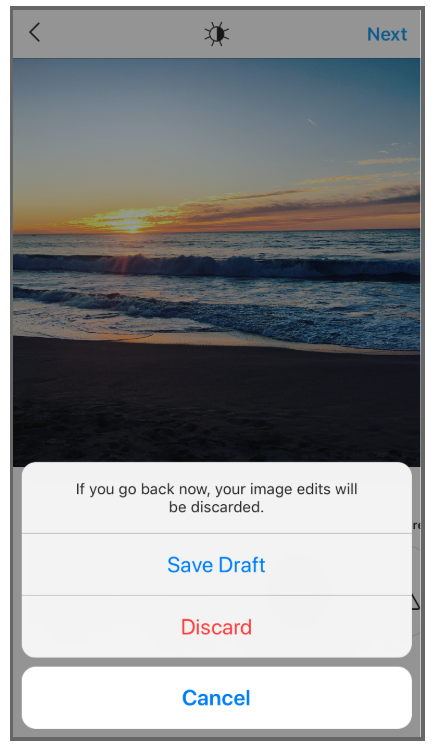
The next time you go to make a post, your draft will be waiting there for you. This option makes it easy to pre-edit multiple photos and post them as you’re ready.
8 of the best Instagram photo editing tools
Now that you know how to edit Instagram photos in the app itself, you’re ready for the next level of photo editing precision—using specialized apps designed for editing Instagram photos.
Luckily, there are a lot of options out there. Having a few of these Instagram photo editing apps in rotation can help you craft exceptional photos and develop a signature look for your feed.
Below are a few of our favorite tools.
VSCO
Ask a popular Instagrammer what photo editing apps they swear by, and chances are VSCO will be at the top of their list. This app is well-loved by expert photographers, and for good reason.
VSCO (pronounced “visco”) is best known for its filters, several of which are included for free when you download the app. If you want to explore beyond the basics and pay, you get access to a huge range of filters—many of which emulate the look of film photography, adding character and depth to your images.
There’s also an in-app camera, enabling you to capture photos with an added degree of precision. Use it to adjust qualities like white balance, aperture, shutter speed, and focus. These features help you take high-quality photos, especially if you’re comfortable with DSLR cameras. But even if you’re new to the concept of an ISO setting, they’re easy to play with.
On top of these features, VSCO enables users to make very subtle adjustments and changes using their editing tools, such as clarity, exposure, white balance, skin tone, and more.
Pro tip: It’s both a tool and a social site: you can save and share your photos with other VSCO users in the app, and explore other users feeds.
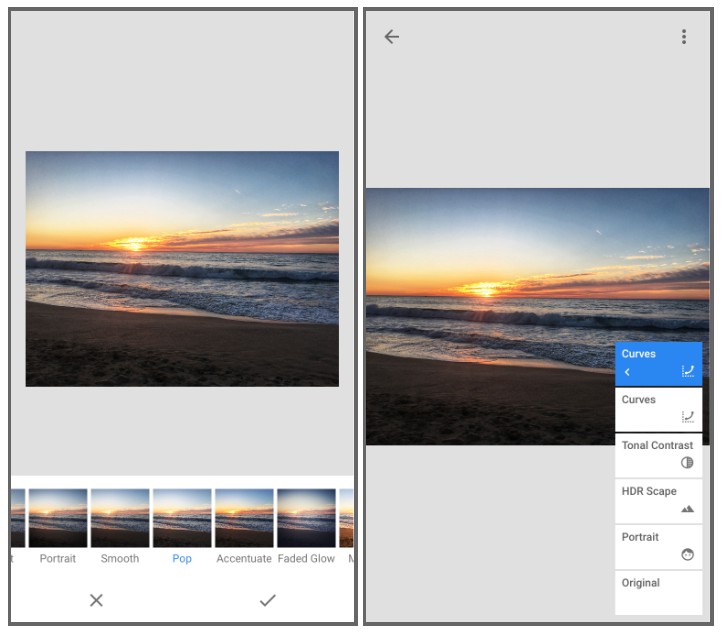
A Color Story
A Color Story is an easy-to-use editing app, focused on making the whites and colors in your photos pop. It also comes with a selection of effects like light leaks, lens flares, and bokeh.
Compared to some advanced photo editing tools, A Color Story is easy to get started with. It feels intuitive if you’re used to the Instagram editor, with a similar interface. It also adds a nice curves tool for adjusting the brightness and darkness of your photo, similar to Photoshop.
The basic app is free, though you can pay for additional special effect and filter packs. Other add-ons are free, or available upon subscribing. But even the basics are great for improving your photos.
Unlike many of the filters available on VSCO or Instagram, which lend vintage flair to photos, A Color Story’s filters makes your images more vibrant and sharp. You can see the impact of their Palm Springs filter on my photo below:
You can even layer filters to get a really customized effect, and create custom filters by saving your edits as you go along.
Pro tip: you can save your favorite filters by pressing the heart icon, creating in-app shortcuts.
Afterlight 2
Afterlight 2 is the newer version of the popular Afterlight app, another stalwart in the world of photo-editing apps.
Unlike VSCO, this app isn’t free.It costs $2.99USD to download. But unlike many other paid tools, there are no in-app purchases or subscription fees. And Afterlight 2 adds new features each month, which means avid users will get a ton of value from it.
Like VSCO, Afterlight 2 boasts a wide selection of filters, adding vibrancy or retro appeal to your photos. It also has dust, light leak, and grain effects that create texture and drama. There is a full suite of editing tools so you can adjust tones and curves to create striking images.
If you want to get really creative, you can layer images for a double-exposure effect, use their color shift tool to create a cool look, or add text and graphic overlays.
There are infinite options with this tool, which is why it’s a go-to for pros. Afterlight 2 offers an expert level of customization options with a beginner-friendly interface.
Snapseed
Snapseed was created by a little company called Google, and it’s just as brilliant as you would expect. Many Instagram photographers call Snapseed their number-one pick for best photo-editing app.
That’s because it offers tons of editing tools that allow users to tweak their photos to perfection. Their tone tool includes all the standard editing features you’re familiar with, and a flattering set of one-tap filters.
Beyond that, they’ve got a wide range of editing options and some unique additions too. These include a Face Pose tool, which allows you to adjust the focal distance (you know, the reason your nose looks so weird when you take a selfie close-up), and a bevy of flattering portrait filters.
The Stacks brush allows you to apply edits selectively to the image. If you just want to brighten or saturate one area of the photo, the Stacks brush is your friend. A nice feature of Snapseed is that every edit is a separate image layer, which means you can remove one without undoing all the edits you made after it.
Snapseed can take awhile to master, but there are plenty of tutorials to help you get the hang of it. Once you learn how the editing brushes work (swipe up and down to cycle through them, then left and right to adjust the intensity of the effect), it becomes pretty intuitive.
Adobe Photoshop Express
Adobe Photoshop Express is a powerful editing app that’s surprisingly easy to use. It offers tons of features and one-tap filters, plus tools like blemish removal, red eye correction, text overlay, and stickers. That makes this tool something of a Swiss army knife—whether you want to make subtle, refined edits or bold, graphic changes.
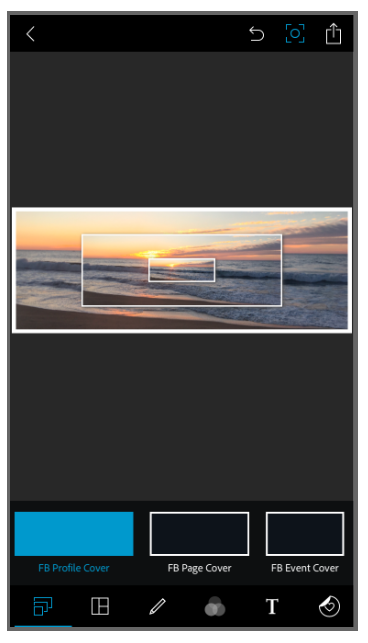
You can also use Photoshop Express to make unique photo collages, using single or multiple images. Helpfully, it also allows you to export these collages in the correct sizes for different platforms and purposes, like Facebook Events or YouTube thumbnails.
Photoshop Express is free, though you need to create an Adobe account to use it. If you already have one, it allows you to sync up with your other Adobe tools. It’s the perfect choice for users who are already using Adobe programs.
TouchRetouch
TouchRetouch is a single-purpose editing app that removes blemishes and unwanted objects from your photos. It’s not free, but the price tag is easy to swallow ($1.99 USD) and it’s simple to use.
If you’ve got some wall graffiti or a piece of windblown trash distracting you from an otherwise perfect shot, this tool is your friend. It’s a nice one to have in your arsenal for touching up a photo before editing it with a more general-purpose app, like Snapseed or VSCO.
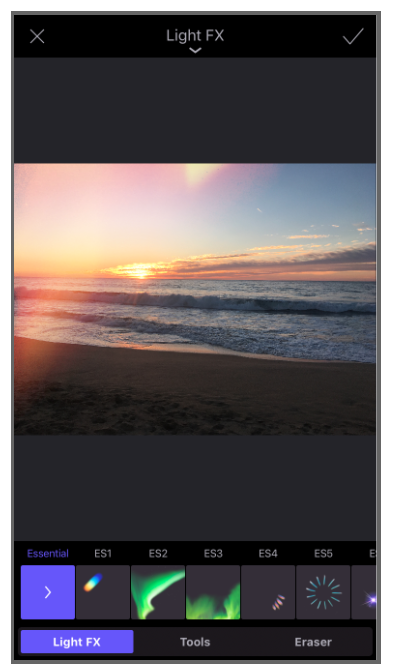
Lens Distortions
Lens Distortions is another app that focuses on doing one task well. In this case, that’s adding light and weather effects to your photos.
Create visual interest and appeal with light leaks, fog, rain, snow, and shimmer. These subtle, natural enhancements add a dreamy quality to your outdoor shots.
Below, I’ve used Lens Distortion to intensify my beach sunset.
Enlight Photofox
Photofox is a departure from the apps above, aimed at making more artistic images than ones that appear seamlessly, naturally edited. It’s free to download with paid add-on features.
Photofox lets you layer images, adjusting the opacity to create a double-exposure effect. You can also add backgrounds and effects to transform your images into everything from watercolor paintings to typographic posters. The erase and restore brushes also let you selectively apply effects and filters.
The app comes with step-by-step and video tutorials that walk you through applying and adjusting the effects. In no time, you’ll be creating unique and dreamy Insta-art.
You can also skip the tutorials and just play around. It’s a fun one to explore!
These are just a few of the Instagram photo editing tools out there. There are plenty more Instagram apps—for editing or otherwise—to discover.
Now that you know how to edit Instagram photos, the key is to find a few apps that work for you and use them regularly to refine and enhance your posts. From there, you can build an inspiring and engaging Instagram presence, one stunning photo at a time. Trust us—your followers will notice.
Schedule and publish your expertly edited Instagram photos directly from the Hootsuite dashboard. Save time, grow your audience, and measure your performance alongside all your other social channels. Try it free today.
The post How to Edit Instagram Photos Like a Pro: A Step-by-Step Guide appeared first on Hootsuite Social Media Management.
Contributer : Hootsuite Social Media Management https://ift.tt/2BAduhR

 Reviewed by mimisabreena
on
Thursday, August 23, 2018
Rating:
Reviewed by mimisabreena
on
Thursday, August 23, 2018
Rating:


No comments:
Post a Comment